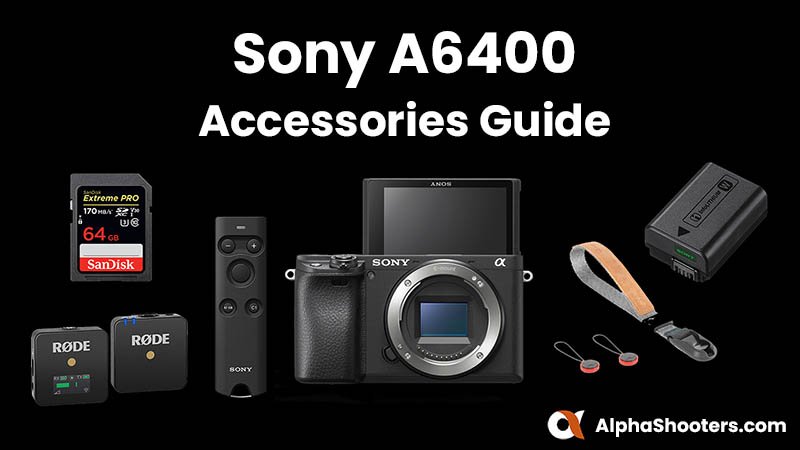
If you have just picked up the Sony a6400 or are still thinking about buying it, then you might like to know which accessories are also worth picking up to go with it.
I’m fortunate to own the Sony a6400 myself as well as many of the accessories included here, so I’ve already spent quite a lot of time reading reviews to figure out which are the best Sony a6400 accessories to buy so that you don’t have to.
If you feel like I’ve missed an accessory worth including or you’d like to provide your own experience (good or bad) of any of the accessories included here, please do let me know in the comments at the end of this article.
Sony A6400 Forum & Facebook Group
If you are looking for further help and advice on the A6400 or would simply like to share your photos and videos, then please head over to our friendly APS-C Forum. If you prefer Facebook then I also run the Sony a6400 Shooters Group.
Sony a6400 Accessories (Contents)
- Top 10 Accessories
- Batteries
- Battery Chargers
- Battery Grips
- Memory Cards and Card Readers
- L-Brackets and Grip Extensions
- Screen Protectors
- Neck / Wrist Straps and Clips
- Cases and Bags
- ND and Polarizing Filters
- Waterproof Housing
- External Flashes, Radio Receivers and Commanders
- Lens Adapters
- Remote Controls
- Intervalometers
- Microphones
- Tripods and Monopods
- Cages
- Gimbals and Stabilizing Rigs
- HDMI Recorders and Monitors
- Camera and Sensor Cleaning
- Replacement Parts
- Storage and Backups
Top 10 Sony a6400 Accessories
Here are my top 10 recommended accessories for the Sony a6400 mirrorless camera.
1. Sony PCK-LM17 Screen Protector
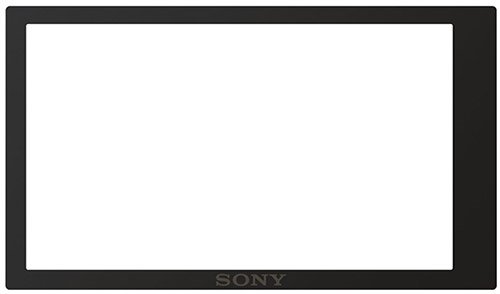
The Sony PCK-LM17 is a semi hard screen protector. Although it’s often advertised as the screen protector for the a6000 and a6300, it works perfectly with the Sony a6400 (I’m using it on mine).
The touch screen still works after the screen protector is installed and it doesn’t affect the clarity of the LCD at all. My Sony a6400 Screen Protector video on YouTube shows the a6400 touch screen working both before and after installing the Sony PCK-LM17.
Just a word of caution. If you don’t manage to align it perfectly the first time it’s best to just leave it. If you remove it and try again it will lose its stickiness and dust and fluff will soon stick to it too.
Price Check & Buyer Reviews for Sony PCK-LM17
At: Amazon
2. Rocket Air Blaster

If you don’t already have a Rocket Air Blaster inside you gear bag then this should definitely be one of your first purchases. It’s great for blowing dust off lenses, your sensor and filters. Mine goes everywhere with me.
3. RAVPower NP-FW50 Batteries & Dual Charger
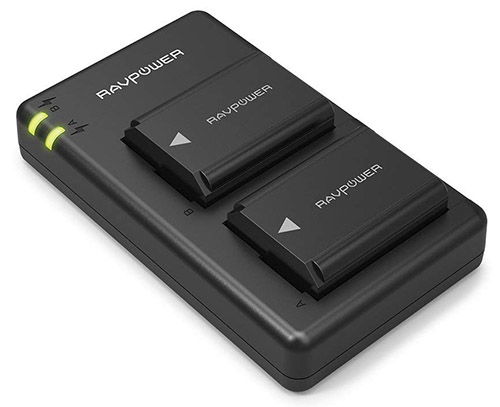
The RAVPower dual battery charger includes also includes two NP-FW50 batteries. It’s really great value and a lot cheaper than the official Sony NP-FW50 batteries and charger. I own one of these myself as well as a handful of official Sony NP-FW50 batteries and I don’t really notice any difference in battery life between them.
There is a micro USB cable included but not a USB wall adapter. Which is probably a good thing since we all probably have hundreds of these lying around and there’s one in the box with the a6400 too.
Price Check & Buyer Reviews for RAVPower NP-FW50
At: Amazon
4. SanDisk Extreme Pro UHS-I (170/90)
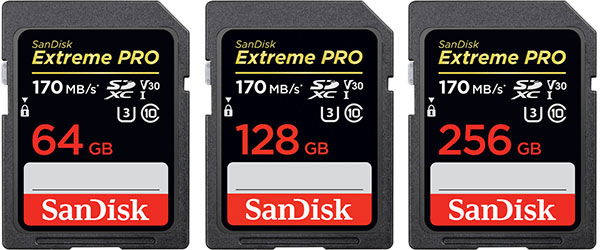
The SanDisk Extreme Pro cards have a claimed read speed of 170MB/s and a write speed of 90MB/s. They are rated UHS speed Class 3 (U3) and UHS video speed Class 30 (V30) which makes them perfect if you are recording 4K video with the a6400.
5. Manfrotto PIXI EVO Mini Tripod
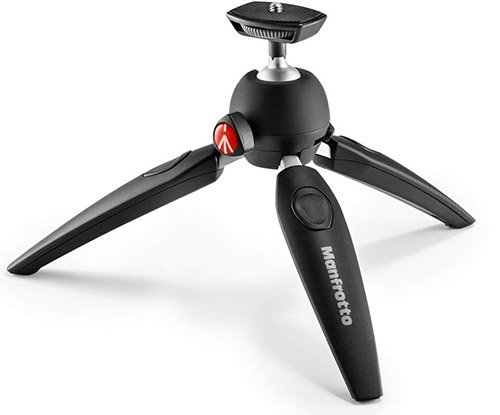
If you are looking for a lightweight mini tripod to take on your travels, then I can highly recommend the Manfrotto PIXI EVO Mini Tripod. The legs extend for a little additional height and stability, and it can also be used as a selfie stick.
I only picked this up recently and now it rarely leaves my bag. It holds the weight of the a6400 easily and supports a maximum of 5.5lbs.
6. Rode VideoMicro
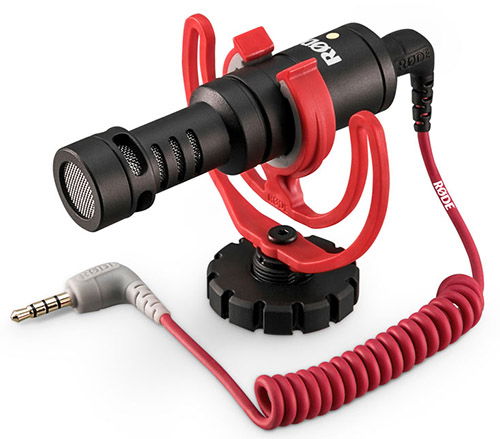
If you aren’t happy with the quality of the internal microphone on the a6400 and the Rode VideoMic Pro+ is a little too expensive, then the Rode VideoMicro is definitely a great alternative.
It’s much smaller and lighter than the Pro version too, so pairs much better with the a6400. No battery is required either, you simply connect it through the mic port.
7. Sony RMT-P1BT Remote Commander
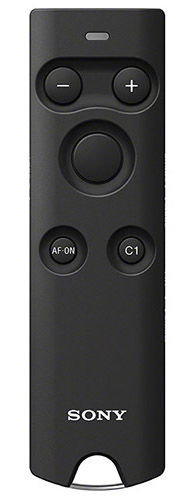
The Sony RMT-P1BT Remote Commander is a great remote control option for the Sony a6400. The RMT-P1BT operates using Bluetooth connectivity which provides a reliable connection even in bright sunlight or when there are obstacles between the remote and the a6400.
In my own tests the RMT-P1BT remote works reliably up to around 18m or 60 feet away from the camera, and this is the case whether you are behind or in front or the camera, indoors or outdoors.
It features a fast 0.05 seconds release time and an external LED that flashes or lights continuously to show shutter, movie recording and AF status. The remote covers essential camera controls including releasing the shutter, a focus button, a lock switch that prevents accidental operation during transport, movie recording start/stop and power/digital zoom. There are also two custom buttons that mirror the functions of the C1 and AF-ON buttons on the camera body.
When the Bluetooth Remote option is enabled in the a6400 settings the Location Info. Link is disabled. So if you are using Imaging Edge Mobile to record your location information via bluetooth, I’m afraid this will not work at the same time as the remote.
Unlike the older RMT-DSLR2 remote, the RMT-P1BT also supports burst shooting. So when you are in continuous shooting mode you can hold down the shutter button to shoot continuously.
Please note that this remote is only supported if you have updated the Sony a6400 firmware to version 2.00 or later.
8. Peak Design Cuff + Slide Lite Straps
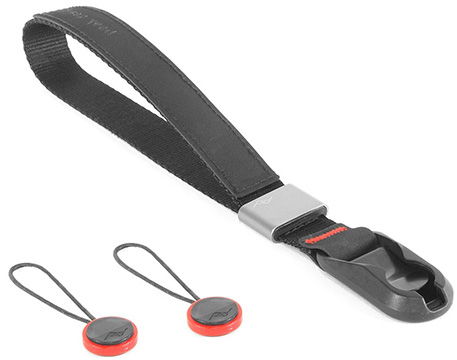
The Peak Design Cuff wrist strap is a great way to protect your camera from accidental drops. It connects to the a6400 via Peak Designs anchor system and the wrist loop magnetically locks in the open position, or comfortably cinches down on your wrist for added security. It took me a little while to get used to the magnetic lock, but now I wouldn’t want to be without this strap.
The Peak Design Slide Lite can be worn as a sling, neck, or shoulder strap. It uses internally-padded nylon webbing has a smooth side that glides over clothing in sling mode and a grippy side that prevents slipping in shoulder mode.
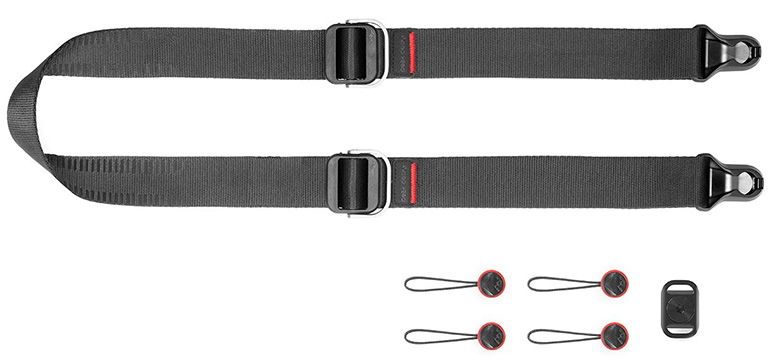
There are two versions of the slide strap, a full sized version with a strap width of 45mm, and a lite version with a strap width of 32mm.
I’ve been using the full sized version of this strap for over a year, but it’s overkill for a mirrorless camera like the a6400. So I’d recommend going with the Lite version which I’ve also since picked up and now the full sized version never gets clipped on!
Price Check & Buyer Reviews for Peak Design Cuff
At: Peak Design | Amazon | B&H Photo
Price Check & Buyer Reviews for Peak Design Slide Lite
At: Peak Design | Amazon | B&H Photo
9. Think Tank Digital Holster 10 V2.0
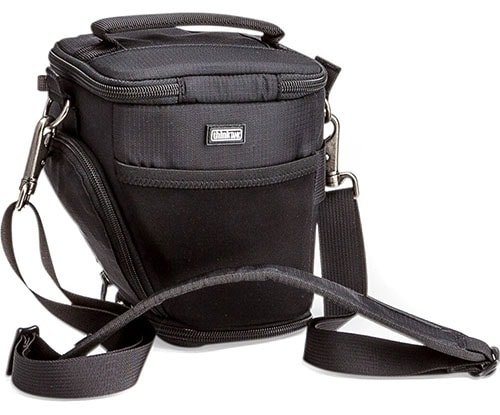
If you are looking for a small bag for the a6400 together with your favorite lens then the Think Tank Digital Holster 10 V2.0 is definitely an option to consider. I recently purchased this bag myself and so far I’m very pleased with the quality.
The bag can be carried using the included shoulder strap or attached to a belt. There’s lots of padding, an inner pocket for memory cards and the side pocket that also houses the waterproof cover still has enough room for a spare battery.
The bag will comfortably fit the a6400 together with a lens up to 115mm / 4.52 inches in length. However you can also extend the bags height by 5.8cm / 2.28 inches using the built in extension at the bottom of the bag.
I’ve tested it with the Sony E 18-105mm F4, the Sony E 18-135mm, Sigma 16mm F1.4, Sigma 30mm F.4 and they all fit comfortably without needing the extension. Using the extension you’ll now fit in the Sony E 70-350, Sony FE 70-300 or the Sony FE 90mm F2.8 Macro lens. So it really is a very versatile camera bag.
Key Features
- “Pop Down” increases bag height by 5.8cm / 2.28 inches for larger lenses
- Shoulder bag attaches to all Think Tank belts and bags with Modular Rails
- Side attachment rail to connect small Modular or Skin component to holster
- Lens hood can remain attached, reversed or in position
- Front stretch pocket for lens caps, back caps, and other items
- Removable screen protector separates your shoulder straps from your LCD
- Compatible with the Digital Holster Harness
- Inner lid pocket for SD cards or lens cloth
- Carry with the top grab-handle or the included shoulder strap
- Business card holder on top of lid
- Seam-sealed rain cover included
More details and additional product photos can be found on Think Tanks website.
10. SmallRig Cold Shoe Relocation Plate BUC2317
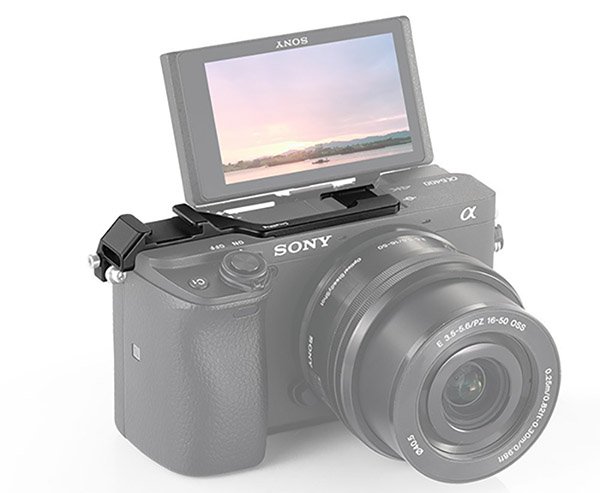
If you want to make use of an external mic on the a6400 but don’t want to block the screen when it’s flipped up, you can easily relocate the hotshoe with this adapter from SmallRig.
If you would like to take a closer look at any of these top 10 accessories then I’ve also talked about them in this YouTube video. Otherwise just skip past this video for my complete accessories guide.
Batteries
The official battery for the Sony a6400 is the Sony NP-FW50 Lithium-Ion 1020mAh rechargeable battery, one of which is included with the a6400. A large number of third-parties have also cloned the NP-FW50 battery, some are much better than others. Here are my recommended battery options for the Sony a6400.
Original Sony NP-FW50 Battery
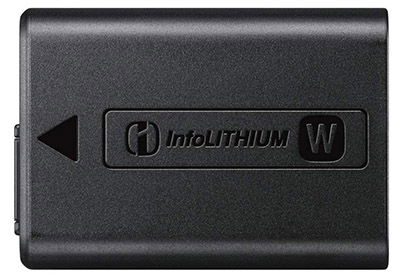
The original Sony NP-FW50 battery is expensive compared to the third-party options which offer a very similar battery life. However, over the long-term the original Sony batteries to tend to hold their charge a lot better.
RAVPower NP-FW50 Batteries & Dual Charger

If you are happy to go with a third-party option then the RAVPower dual battery charger includes also includes two NP-FW50 batteries. It’s really great value and a lot cheaper than the official Sony NP-FW50 batteries and charger.
I have this charger and batteries myself and have never had any issues. There is a micro USB cable included but not a USB wall adapter. Which is probably a good thing since we all probably have hundreds of these lying around and there’s one in the box with the a6400 too.
Price Check & Buyer Reviews for RAVPower NP-FW50
At: Amazon
Battery Chargers
The Sony a6400 does not include an external battery charger in the box, so here are some of the best options if you wish to charge the NP-FW50 battery outside of the camera.
Sony BC-TRW W Series Battery Charger
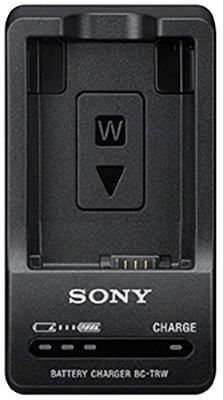
The Sony a6400 does not come with an external battery charger in the box. Instead you simply get a micro USB cable to charge the NP-FW50 inside the camera. If you want the official Sony external charger then the Sony BC-TRW W is one of the options that you have to choose from. It will charge a completely drained NP-FW50 battery in around 220 minutes (3 hours 40 minutes).
AC-PW20 Dummy Battery
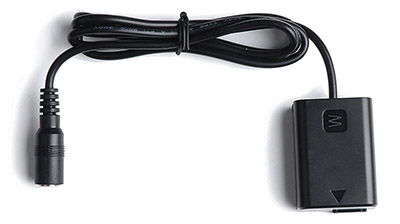
If you would like to power the a6400 for extended periods of time longer than a single NP-FW50 battery can deliver, then you can use a dummy battery connected to a USB Power Bank. I’m using the AC-PW20 Dual USB dummy battery with my a6400 and it works fine together with a portable charger like the Anker PowerCore 20100mAh or RAVPower 22000mAh.
Price Check & Buyer Reviews for AC-PW20 Dummy Battery
At: Amazon
Anker PowerCore 20100mAh
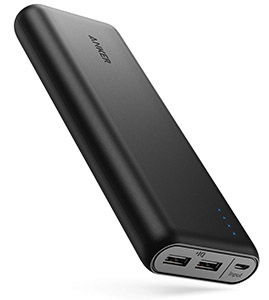
Using an external charger is a great way to power the a6400 for extended periods of time, like when video recording or shooting a time-lapse, or to simply charge the NP-FW50 battery in-camera.
Price Check & Buyer Reviews for Anker PowerCore 20,100mAh
At: Amazon
Battery Grips
The a6400 was never designed to take a battery grip and there is no official battery grip from Sony available. However, there are some third party options that you might want to consider.
Meike MK-A6300 Vertical Grip
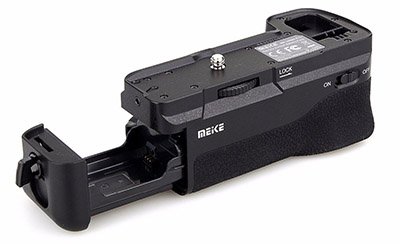
Meike MK-A6300 vertical grip is designed for the Sony a6000 and a6300, however it does fit the a6400 and allows you to double the battery life when you have 2x NP-FW50 batteries inserted in the grip as well as improving the ergonomics of the a6400. Since the a6400 was never designed to work with a battery grip (there is no official Sony grip), you will not get a status indicator for the two individual batteries.
To make use of the shutter button on the grip itself you need to connect the supplied cable between the grip and the a6400. However when I first bought this grip the vertical shutter button did not work even with the cable connected. It now does appear to work and the only change I have made is updating the a6400 firmware to v2.00.
Price Check & Buyer Reviews for Meike MK-A6300
At: Amazon
Memory Cards
There are so many SD Cards to choose from it can be quite the challenge. However, if you want to record 4k video then it is recommended to go with Class 30 (V30) cards.
If you’d like to know more about memory cards then please visit my Sony A6400 Memory Card Guide where I’ve speed tested 6 different cards in-camera and included all of the buffer results for each file format.
Based on the results of my in-camera speed/buffer tests the SanDisk Extreme Pro UHS-I (170/90) card is a great choice to pair with the a6400.
SanDisk Extreme Pro UHS-I (170/90)

The SanDisk Extreme Pro cards have a claimed read speed of 170MB/s and a write speed of 90MB/s. They are rated UHS speed Class 3 (U3) and UHS video speed Class 30 (V30) which makes them perfect if you are recording 4K video with the a6400.
Beeway Water & Shock Resistant Memory Card Case
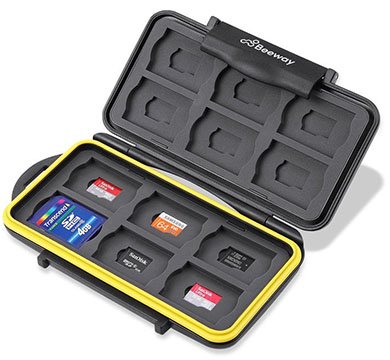
I don’t go anywhere without my Beeway SD Card holder. It holds 12 SD/SDHC/SDXC cards and 12 MicroSD cards perfectly in place. The case is water resistant and very strong. It also includes a small bag and a carabiner. It really is great value for the price.
Price Check & Buyer Reviews for Beeway Memory Card Case
At: Amazon
L-Brackets & Grip Extensions
Since the Sony a6400 has the same body to the a6300 many of the l-brackets and grip extensions that fit the a6300 should also fit the a6400. That said, I’m only going to be including the accessories here that I have tested myself with the a6400 or one of our community members has tested and confirmed that they work with the a6400.
UURig R006 Camera Hand Grip L Plate for Sony A6400
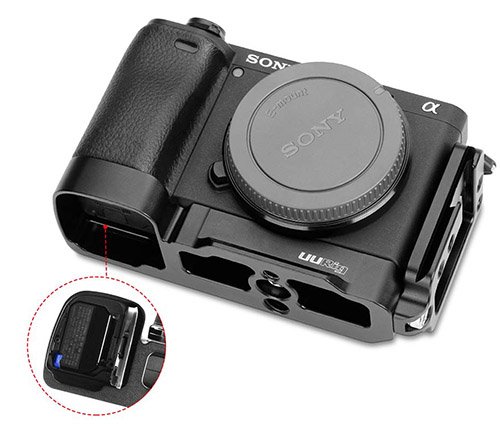
The UURig R006 L Plate fits the Sony a6400 perfectly and still allows you full access to the battery compartment and side ports. This l-plate also doubles as a grip extension.
It has an Arca Swiss plate on both the bottom and the side for easy mounting to your tripod head, there’s also a cold-shoe mount on the side so that you could mount a microphone like the Rode Videomicro without blocking the screen on the a6400 when it’s flipped up. If you prefer you can detach the slide plate completely.
I own this l-plate myself and the only negative that I would mention is that’s it’s a little more difficult to pinch and pull out the memory card with the plate attached, but not impossible.
I’ve done a quick review on YouTube for the UURig R006 if you’d like to take a closer look at this l-bracket.
Price Check & Buyer Reviews for UURig R006
At: Amazon
Screen Protectors
Because the Sony a6400 has a touch screen you need to be very careful which screen protectors you use, apply the wrong one and you may find that touch to focus/track no longer works. Here are my recommendations for the best Sony a6400 screen protectors.
Sony PCK-LM17 Screen Protector

The Sony PCK-LM17 is a semi hard screen protector. Although it’s often advertised as the screen protector for the a6000 and a6300, it is full supported and works perfectly with the Sony a6400 (I’m using it on mine).
The touch screen still works perfectly after the screen protector is installed and it doesn’t affect the clarity of the LCD at all. My Sony a6400 Screen Protector video on YouTube shows the a6400 touch screen working both before and after installing the Sony PCK-LM17.
Price Check & Buyer Reviews for Sony PCK-LM17
At: Amazon
Neck Straps, Wrist Straps and Clips
The a6400 does include a very basic neck strap in the box, but it is basic and most certainly not the most comfortable of neck straps. It’s also difficult to attach and remove quickly if you want to make use of a wrist strap instead.
Here are my recommendations for alternative wrist and neck straps, as well as carrying clips for the a6400.
Peak Design Slide / Slide Lite

The Peak Design Slide can be worn as a sling, neck, or shoulder strap. It uses internally-padded nylon webbing has a smooth side that glides over clothing in sling mode and a grippy side that prevents slipping in shoulder mode.
Peak Designs unique Anchor Link system connects quickly with dual connection points to keep your camera more stable than traditional sling straps.
There are two versions of this sling, a full sized version with a strap width of 45mm, and a lite version with a strap width of 32mm. I’ve been using the full sized version of this strap for over a year, but it’s overkill for a mirrorless cameras like the a6400, so I’d recommend going with the Lite version which I’ve also since picked up and now the full sized version never gets clipped on!
Price Check & Buyer Reviews for Peak Design Slide Lite
At: Peak Design | Amazon | B&H Photo
Peak Design Cuff

The Peak Design Cuff is a great way to protect your camera from accidental drops. It connects to the a6400 via Peak Designs anchor system and the wrist loop magnetically locks in the open position, or comfortably cinches down on your wrist for added security.
Price Check & Buyer Reviews for Peak Design Cuff
At: Peak Design | Amazon | B&H Photo
Peak Design Capture Camera Clip
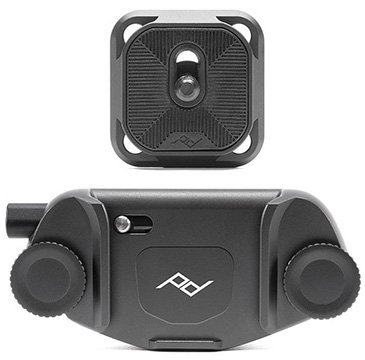
The Capture clip is a secure, convenient, and accessible way to carry your camera. Capture keeps your camera stable while hiking, biking, or moving around anywhere you choose.
Capture includes 2 components: a metal clip that clamps to any backpack strap, belt, or bag, and an Arca tripod-compatible plate that screws into the bottom of your camera.
I own one myself and will often use it attached to the strap on my rucksack for quick access whilst hiking, gone are the days when my camera sits in my bag and rarely comes out.
Price Check & Buyer Reviews for Peak Design Capture Camera Clip
At: Peak Design | Amazon | B&H Photo
Cases and Bags
There are a bewildering numbers of cases and bags available that you can use to keep the a6400 along with your lenses and other accessories safe. Here are just some of my recommendations.
Think Tank Digital Holster 10 V2.0

If you are looking for a small bag for the a6400 together with your favorite lens then the Think Tank Digital Holster 10 V2.0 is definitely an option to consider. I recently purchased this bag myself and so far I’m very pleased with the quality.
The bag can be carried using the included shoulder strap or attached to a belt. There’s lots of padding, an inner pocket for memory cards and the side pocket that also houses the waterproof cover still has enough room for a spare battery. battery.
The bag will comfortably fit the a6400 together with a lens up to 115mm / 4.52 inches in length. However you can also extend the bags height by 5.8cm / 2.28 inches using the built in extension at the bottom of the bag.
I’ve tested it with the Sony E 18-105mm F4, the Sony E 18-135mm, Sigma 16mm F1.4, Sigma 30mm F.4 and they all fit comfortably without needing the extension. Using the extension you’ll now fit in the Sony E 70-350, Sony FE 70-300 or the Sony FE 90mm F2.8 Macro lens. So it really is a very versatile camera bag.
Key Features
- “Pop Down” increases bag height by 5.8cm / 2.28 inches for larger lenses
- Shoulder bag attaches to all Think Tank belts and bags with Modular Rails
- Side attachment rail to connect small Modular or Skin component to holster
- Lens hood can remain attached, reversed or in position
- Front stretch pocket for lens caps, back caps, and other items
- Removable screen protector separates your shoulder straps from your LCD
- Compatible with the Digital Holster Harness
- Inner lid pocket for SD cards or lens cloth
- Carry with the top grab-handle or the included shoulder strap
- Business card holder on top of lid
- Seam-sealed rain cover included
More details and additional product photos can be found on Think Tanks website.
Lowepro Apex 100 AW Case
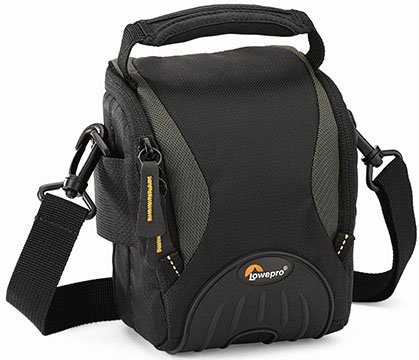
If you just have the little 16-50mm kit lens with your a6400 then the Lowepro Apex 100 AW Case fits both nicely. It includes a built in waterproof cover, a belt loop, adjustable strap and carry handle, lens cleaning cloth, internal netting for accessories, a pocket for a spare battery and also a small pocket to keep a couple of SD Cards safe.
Price Check & Buyer Reviews for Lowepro Apex 100 AW Case
At: Amazon
Lowepro ProTactic 450 AW Camera and Laptop Backpack
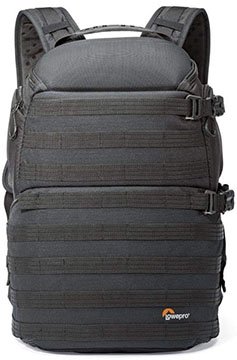
The Lowepro ProTactic 450 AW is a serious backpack and one of the most popular on the market. There’s plenty of room in here for the a6400, multiple lenses and a 15″ laptop.
The straps are well padded and there’s a built-in waterproof cover to keep your gear dry. I don’t own this backpack myself, but after reading the reviews on Amazon I’m thinking that I probably should!
Lowepro Flipside 400AW II Backpack
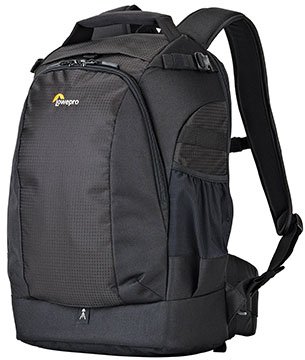
Another very popular choice with photographers is the Lowepro Flipside 400AW II. Like the ProTactic 450, there’s plenty of room in here for your a6400 and multiple lenses. There’s also space for a 15″ laptop or tablet. The built-in waterproof cover will keep your gear dry when the rain comes down.
Peak Design Everyday Messenger 13 V2
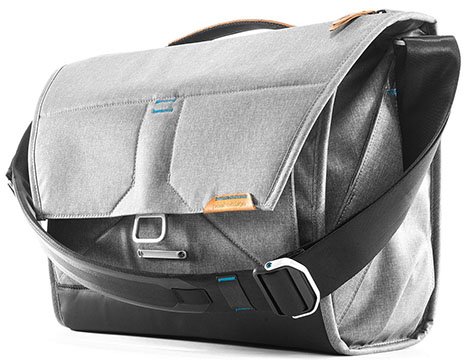
The Peak Design Everyday Messenger 13 V2 features a MagLatch closure, origami-inspired FlexFold dividers, weatherproof expandable protective shell (400D nylon canvas) and hyper-adjusting internally padded seatbelt strap.
There are dedicated Peak Design Capture clip attachment points and front access panel. You’ll find that the a6400 fits inside with room for a couple of lenses and accessories as well as a 13″ laptop.
Price Check & Buyer Reviews for Peak Design Everyday Messenger 13 v2
At: Peak Design | Amazon | B&H Photo
Peak Design Everyday Backpack
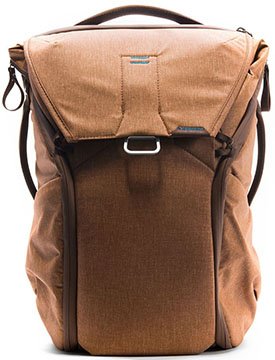
The Everyday Backpack from Peak Design provides great accessibility, expandability, and organization of your Sony Alpha gear. The MagLatch provides lightning fast top access, and there’s dual side-loading via two weatherproof side zips.
Integrated luggage carry makes this bag equally suited for daily commutes and extended travel. There are internally padded accessory pockets to help keep small items in place and a dedicated sleeve for up to a 15” laptop, tablet, and documents.
You also never need to worry about your gear getting wet since it features a weatherproof 400D nylon canvas shell. I don’t own this bag, but it is definitely on my list for when I win the lottery as it’s not cheap. The Everyday Backpack is available in both 20L and 30L sizes and 4 different colors options.
Price Check & Buyer Reviews for Peak Design Everyday Backpack
At: Peak Design | Amazon | B&H Photo
ND and Polarizing Filters
When it comes to ND and Polarizing filters it really is best not to skimp on cheap filters that may impact the quality of your images. Here are some of the best filter options to use with your lenses on the Sony a6400.
Breakthrough X2 Screw-in ND Filters
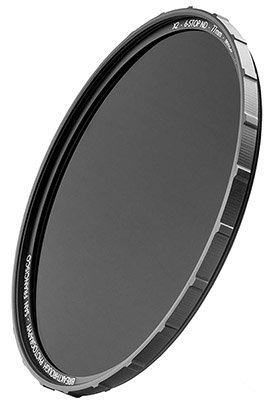
Just like their CPL filter, the Breakthrough X2 ND filters are color neutral so there is no color cast that will require removing in post. The X2 ND features critically sharp H-K9L optical glass made in Japan, and incorporates their MRC8 to eliminate unwanted glare and ghosting. MRC8 is structurally harder than the glass itself, providing a protective scratch-resistant layer, shielding the glass from the elements. There is a 25-year guarantee included.
Price Check & Buyer Reviews for Breakthrough X2 ND
At: Amazon
Breakthrough X4 Screw-in ND Filters
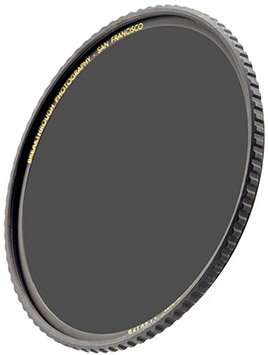
A step up in quality from the X2 ND filters, the X4 filters features SCHOTT Superwhite B270® optical glass, which is an ultra clear crown glass. There are 16 layers of multicoating (8 per side with the outer being hydrophobic) compared with 8 layers for the X2. The X4 incorporates state-of-the-art nanotec® Nano Coatings Technology, which beads water and other elements rather than absorbing and smearing. There is a 25-year guarantee included.
Price Check & Buyer Reviews for Breakthrough X4 ND
At: Amazon
Breakthrough X4 Screw-in CPL Filters
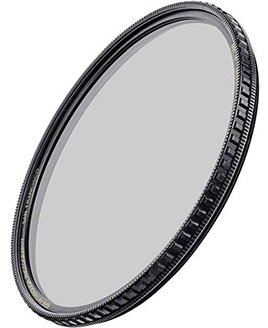
Breakthrough CPL filters are color neutral so there is no color cast that will require removing in post. They are made from SCHOTT Superwhite B270® optical glass. Each side of the glass is then treated with eight layers of Breakthrough Photography’s proprietary nanotec® and MRC (multi-resistant coatings) optical coatings which cause dirt and moisture to essentially slide right off of the glass itself. You won’t need to look too far to find glowing reviews of these filters.
Price Check & Buyer Reviews for Breakthrough X4 CPL
At: Amazon
Waterproof Housing
Although waterproof housings that exist for the Sony a6300 should bit and work perfectly with the a6400, until this is confirmed I will not be adding any recommendations here for now.
External Flashes, Radio Receivers and Commanders
The Sony a6400 does include an internal popup flash which is great if you want to travel very light and just need a little extra light to fill the scene. However, if you want to get serious then you’ll need to take a look at some of the external flash options. Here are my recommendations:
Sony HVL-F45RM
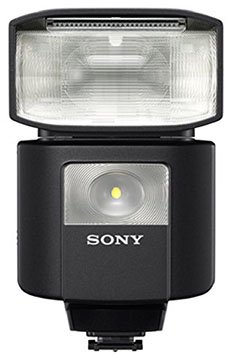
The HVL-F45RM is a compact flash packed with plenty of features, and just like the a6400 it’s dust and moisture resistant. The head can be rotated 180° and tilted up to 120°. The flash is pretty powerful and offers 45m/148’ (ISO 100) and a range of 24mm to 105mm.
It has a built-in wireless radio-controlled system, and can be used as either a commander or receiver. As a commander you can connect up to 15 compatible flashes or receivers in up to 5 groups. Full details can be found on Sony’s website.
Sony HVL-F60RM
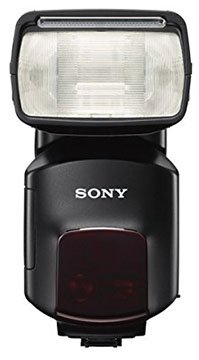
Sony’s flagship flash is the HVL-F60RM. More powerful than the HVL-F45RM, if you simply want a top-of-the-range flash and money is no object then this is it. Further details can be found on Sony’s website.
Godox VING V860IIS TTL
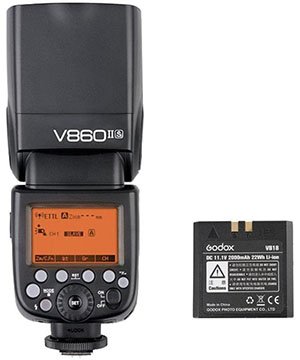
If the price of the Sony flash units is a little to steep, then you’ll be pleased to know that the Godox VING V860IIS TTL is much more affordable. If you read the reviews on Amazon you certainly won’t find too many disappointed customers. I’ve also recently picked one up myself.
Sony FA-WRC1M Wireless Radio Commander
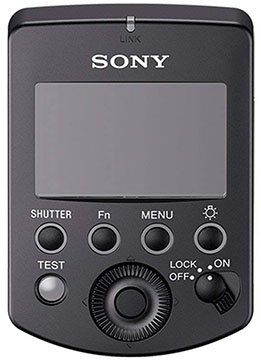
You can use the FA-WRC1M to connect up to 15 wireless receivers (FA-WRR1) for radio wireless flash control. You can also control existing flash units like the HVL-F60M, F45RM, F43M or F32M over a range of up to 30 m (98.4 ft.). For details on how this works I recommend taking a look at Sony Ambassador Mark Galer’s article.
Sony FA-WRR1 Wireless Radio Receiver
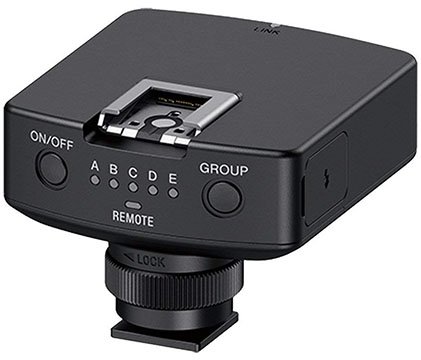
You can pair a maximum of up to 15 FA-WRR1 receivers with the FA-WRC1M commander. Full details on Sony’s website.
Lens Adapters
If you want to use a non E-mount lens on your Sony a6400 then there are a handful of lens adapters that you can turn to.
Sony A-Mount to Sony E-Mount Lens Adapters
For adapting Sony A-mount lenses to the a6400 there are three adapters to choose from. For a full comparison of these lens adapters I’d recommend checking this Sony Article.
Sony LA-EA5 Lens Mount Adapter
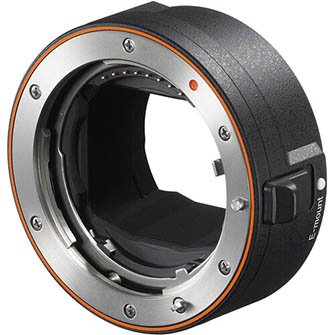
The LA-EA5 is Sony’s newest A-mount to E-mount adapter. The LA-EA5 adapter provides autofocus support for Sony A-mount SSM (Super Sonic wave Motor) lenses, SAM (Smooth Autofocus Motor) lenses, and even non-motorized screw-drive lenses (currently limited to the a7R IV and a6600 only) in still shooting modes.
Sony LA-EA4 Lens Mount Adapter
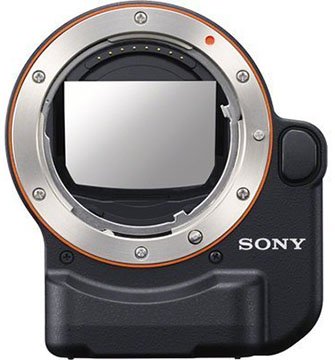
The LA-EA4 A-Mount to E-Mount Lens Adapter enables you to attach most A-mount lenses to an E-mount full-frame digital camera body like the a7R IV. The adapter features a built-in AF motor, aperture-drive mechanism and Translucent Mirror Technology to enable full-time, continuous, TTL phase-detection autofocus. AF is supported with all A-mount lenses except STF models, and auto exposure will be enabled with all compatible lenses. Teleconverters and Minolta XI lenses are not compatible.
Sony LA-EA3 Lens Mount Adapter
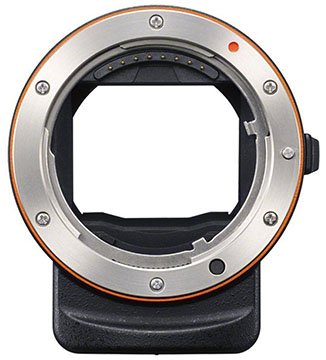
The LA-EA3 A-Mount to E-Mount Lens Adapter enables you to attach most A-mount lens to an E-mount full-frame camera body. It supports Auto Exposure (AE) and features an aperture mechanism. Unlike the LA-EA4 adapter, this does not include the AF motor.
Canon EF to Sony E-Mount Lens Adapters
If you wish to adapt Canon EF mount lenses to Sony E-mount cameras then the following adapters are two of your best choices:
Metabones Canon EF/EF-S T Smart Adapter
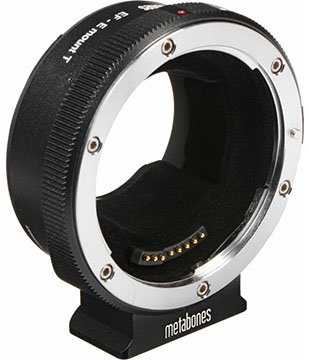
The Metabones adapter lets you mount Canon EF/EF-S lenses to Sony E-mount cameras like the a6400. It retains electronic communication between the camera and lens to provide automatic aperture control, EXIF data, image stabilization and autofocus. Metabones regularly update the firmware that helps to improve AF performance with many Canon EF lenses.
Sigma MC-11 Mount Converter
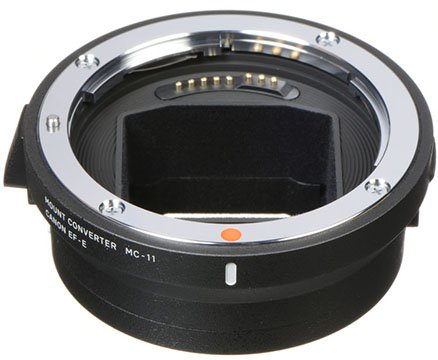
The MC-11 Mount Converter enables the use of Sigma EF-mount lenses on Sony E-mount camera bodies. It supports autofocus and auto-exposure, as well as in-camera image stabilization and full EXIF data transfer.
Sigma has a lens compatibility list for this adapter, but many Canon lenses also work very well although not on their list. I’d recommend a quick Google search to see which lenses people are successfully using in the forums.
Nikon F to Sony E-Mount Adapters
If you want to adapt Nikon F mount lenses to Sony E-mount, then there’s one adapter that you might want to consider.
Monster Adapter LA-FE1 Magic Ring
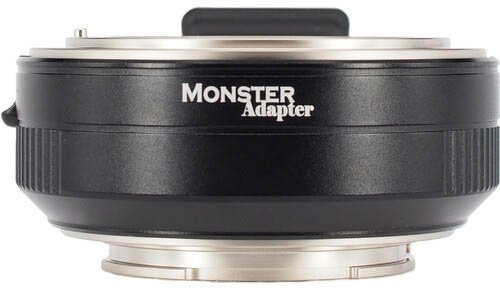
The Monster Adapter LA-FE1 Magic Ring adds autofocus support to Nikon AF-I, AF-S and AF-P lenses when used with the Sony a6400.
For lenses that are fully support, the adapter will drive both electromagnetic and mechanical lever aperture diaphragms. Fully-manual lenses and screw-drive lenses don’t get any sort of focus or aperture control, but the adapter will work passively with them.
The adapter will work together with lens stabilization when available and also works together with Sony’s in-body stabilization (IBIS).
The adapter also supports Sony’s Human and Animal Eye-AF, as well as high-speed continuous shooting up to 10 frames per second.
Price Check & Buyer Reviews for Monster Adapter LA-FE1 Magic Ring
At: Amazon | B&H Photo
Remote Controls
If you want to control your a6400 remotely there are a couple of options available besides using your mobile phone.
Sony RMT-P1BT Remote Commander

The Sony RMT-P1BT Remote Commander is a great remote control option for the Sony a6400. The RMT-P1BT operates using Bluetooth connectivity which provides a reliable connection even in bright sunlight or when there are obstacles between the remote and the a6400.
In my own tests the RMT-P1BT remote works reliably up to around 18m or 60 feet away from the camera, and this is the case whether you are behind or in front or the camera, indoors or outdoors.
It features a fast 0.05 seconds release time and an external LED that flashes or lights continuously to show shutter, movie recording and AF status. The remote covers essential camera controls including releasing the shutter, a focus button, a lock switch that prevents accidental operation during transport, movie recording start/stop and power/digital zoom. There are also two custom buttons that mirror the functions of the C1 and AF-ON buttons on the camera body.
When the Bluetooth Remote option is enabled in the a6400 settings the Location Info. Link is disabled. So if you are using Imaging Edge Mobile to record your location information via bluetooth, I’m afraid this will not work at the same time as the remote.
Unlike the older RMT-DSLR2 remote, the RMT-P1BT also supports burst shooting. So when you are in continuous shooting mode you can hold down the shutter button to shoot continuously.
Please note that this remote is only supported if you have updated the Sony a6400 firmware to version 2.00 or later.
Sony RMT-DSLR2 Wireless Remote Commander
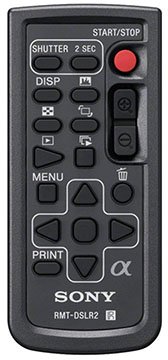
If you are looking for a wireless remote control for the a6400 then the Sony RMT-DSLR2 is a pretty good solution. It uses infrared communication and is pretty reliable, however it does work better from the front of the a6400 especially when shooting outdoors.
Sadly it rarely works well from behind the camera when outdoors, but works perfectly indoors from behind with a range of around 5-6 meters (18-20 feet) away from the camera.
It will also work outdoors with the same range when you are in front of the camera, and a range of 3-4 meters (10-13 feet) to the side of the camera.
As well as letting you control your shutter for long exposures in bulb mode, it also lets you to control other aspects of the camera. You can access and change menu/settings, start and stop video recording via the ‘start/stop’ button, and remotely review photos, delete photos, or even send photos to your printer if you have this setup.
It doesn’t however work when burst shooting, so if you are in any of the continuous shooting modes then it only fires the shutter once.
Just remember to enable the remote control option in the Setup4 menu of the a6400 otherwise it won’t work at all.
Sony RM-VPR1 Remote Commander
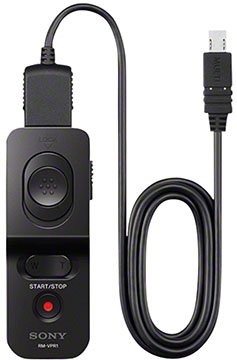
The RM-VPR1 is a cabled remote that connects to the multi-terminal on the a6400. There’s a shutter release button which can also be locked on, a video recording start and stop button, as well as a zoom control rocker switch.
Intervalometers
The Sony a6400 does includes an intervalometer built-in, so there is no need to purchase an external option. But if you would prefer an external intervalometer then the Pixel TW-283 is one of your best options.
Pixel TW-283
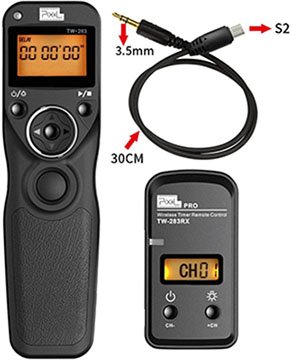
The Pixel TW-283 not only works as a remote control it also works as an intervalometer, and best of all it has a range of around 80 meters. With the intervalometer mode you can select the initial delay, exposure duration, the interval time, number of shots to take, interval repeat time and the number of cycles.
The Pixel TW-283 includes both a remote and a receiver unit. The receiver can be attached to the hot-shoe of the a6400 it then connects via Micro USB cable.
Price Check & Buyer Reviews for Pixel TW-283
At: Amazon
Microphones
Although the a6400 does include an internal microphone the quality is certainly not the best. Therefore if you want to improve your sound quality you will need to consider using an external microphone.
However, if you mount a microphone to the hotshoe on the a6400 and flip the screen up for a spot of vlogging the microphone will block the screen. Fortunately there are a couple of solutions here that we will look at before continuing to the microphones.
SmallRig Cold Shoe Relocation Plate

If you want to make use of an external mic on the a6400 but don’t want to block the screen when it’s flipped up, you can easily relocate the hotshoe with this adapter from SmallRig.
Ulanzi PT-3 Triple Cold Shoe Mount
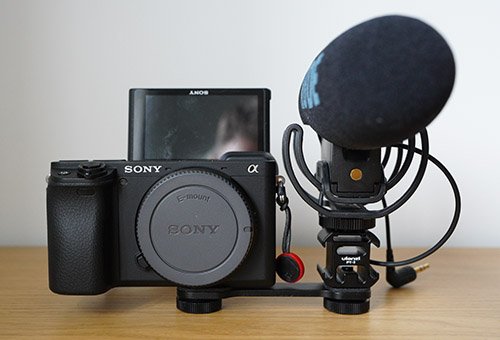
Another option to relocate the microphone is the Ulanzi PT-3 Triple Cold Shoe Mount that lets you mount a microphone to the side of the a6400.
Rode VideoMic Pro R

The Rode VideoMic Pro R is a very popular shotgun microphone which also includes Rycote’s Lyre suspension system to isolate your microphone from vibrations or rumbling when operating the camera. It connects to the camera directly using the 3.5mm input and provides a dual mono signal. I picked up one of these myself recently for my new YouTube Channel.
Rode VideoMicro

If the Rode VideoMic Pro+ is a little too expensive then the Rode VideoMicro is definitely a great alternative. It’s much smaller and lighter than the Pro version too, so pairs much better with the a6400. No battery is required either, you simply connect it through the mic port where it also gets it power.
Rode Wireless Go
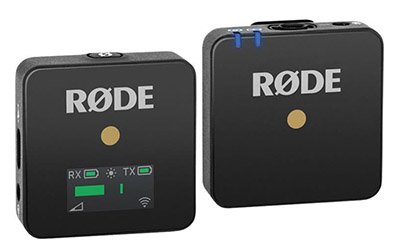
Rode’s latest audio recording system is the Wireless GO. It features a very compact design and offers a simple receiver and transmitter with microphone built in. The two-piece set simplifies the setup process by clipping the transmitter-microphone combo to your subject then connecting the receiver to the a6400.
The Wireless GO uses an internal lithium-ion battery that Rode claims will last up to seven hours. Charging is done to both transmitter and receiver via USB-C ports and it can be fully recharged in two hours.
The transmitter has a built-in pre-polarized omnidirectional microphone with a frequency range of 50 Hz to 20 kHz and weighs just one ounce. It also has a 3.5mm TRS powered port to support a lavalier microphone. The Wireless GO can transmit up to 230 feet and uses the same 2.4 GHz frequency band as the RodeLink.
Rode RodeLink Wireless Filmmaker kit
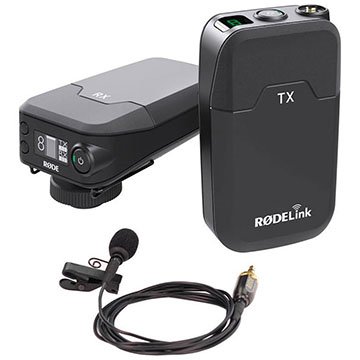
The RODELink Filmmaker Kit provides everything you need to record audio wirelessly, including a receiver, transmitter and lavalier microphone. The receiver features an OLED display with information on level, battery status (receiver and transmitter), mute and channel selection.
The unit can be mounted on the a6400 hotshoe mount, a 3/8 inch thread or belt-clip. The lightweight transmitter can be fitted to a belt or clothing and features a locking thread to ensure the microphone connection is as secure as possible.
Tripods and Monopods
One of the reasons that many photographers switch to the Sony Mirrorless System and a camera like the a6400 is to save weight. A lighter and small camera also means that you no longer need the largest and heaviest tripod on the market to stabilize your camera. As you most likely already know, there are thousands of tripods on the market to choose from. Here are just a few of my recommendations including the ones that I’m using myself.
Manfrotto PIXI EVO Mini Tripod

If you are looking for a lightweight mini tripod to take on your travels, then I can highly recommend the Manfrotto PIXI EVO Mini Tripod. The legs extend for a little additional height and stability and it can also be used as a selfie stick. I only picked this up recently and now it rarely leaves my bag. It holds the weight of the a6400 easily and supports a maximum of 5.5lbs.
Manfrotto MT055XPRO3 055 Aluminum 3-Section Tripod
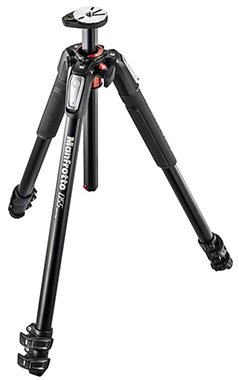
If the price of the previous 3 tripods is a little too steep, then the Manfrotto MT055XPRO3 3-section aluminum tripod might be just what you are looking for.
The main feature of the 055XPRO3 is its 90°centre column mechanism, which allows the column to be extended vertically or horizontally to open up a wide range of photography and video applications.
It weighs 2.5kg, supports a maximum load of 9kg, extends to a maximum height of 170cm and folds down to just 61cm.
The tripod doesn’t typically include a head, so you’ll need to look at something like the Manfrotto XPRO Ball Head with 200PL Quick Release Plate to attach this to the a6400.
Sirui T-025SK Carbon Fiber Travel Tripod with Ball Head

Although I don’t own the Sirui T-025SK I do own its predecessor the Sirui T-025x. I was previously using the MeFOTO RoadTrip for my travel tripod until a friend showed me his T-025x and I was blown away by how much smaller and lighter this was than the RoadTrip.
The Sirui T-025SK is very similar to the Sirui T-025x. It’s made from carbon/magnesium, has 5 leg sections with 4 twist locks and includes the B-00 ball head. It collapses down to 34cm with the head attached or 30cm without, and weighs just 1 kg / 2.2 lb with the head.
It’s capable of supporting loads of up to 5kg / 11 lb. It extends to a maximum height of 130cm with the center column or 95cm without, and will drop down to as low as 17cm without the center column with the ball head on or 10cm with the ball head off. There’s a handy carabiner for attaching a rucksack to add stability as well.
The Sirui T-025SK is available in the US and many other countries but it doesn’t appear to be available in the UK at this time. But you can still purchase its predecessor the Sirui T-025x which I own myself. The Sirui T-025x includes the C-10S ball head, collapses to just 30cm with the head attached, and weighs just 0.88kg / 1.94lb with the head.
It’s capable of supporting loads of up to 6kg / 13.2 lb. It extends to a maximum height of 130cm with the center column or 95cm without, and will drop down to as low as 17cm without the center column with the ball head on or 10cm with the ball head off. There’s also a handy carabiner for attaching a rucksack or weights to add additional stability.
MeFOTO RoadTrip Travel Tripod
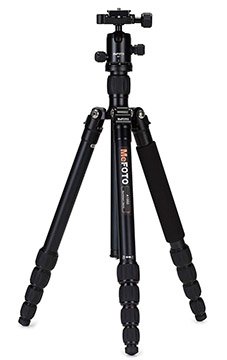
The MeFOTO RoadTrip is a great travel tripod for the Sony a6400. I’ve owned one for over 2 years until I replaced it with the Sirui T-025x. It’s only 39.1 cm when folded but extends to 156.46 cm, it weighs 1.63kg / 3.6lb and can support up to 7.98kg / 17.6lb.
It comes with a precision matched Q series ballhead and Arca-Swiss style compatibility quick release plate with integral bubble level. This tripod is built like a rock and receives glowing reviews, I only replaced mine because I was looking for something a little smaller and lighter, otherwise I would have most definitely held on to it.
Peak Design Travel Travel Tripod Carbon

The Peak Design Travel tripod raised over $12 million on Kickstarter in 2019, largely due to its unique compact design and Peak Designs reputation for building high quality products.
There are two versions of this tripod available, a carbon model that weighs 1.27 kg (2.81 lbs), and the aluminum model that weights 1.56 kg (3.44 lbs). Both versions have a maximum weight capacity of 9.1 kg (20 lbs) so you can even use this tripod with telephoto lenses.
The tripod features a very compact form factor and 5 section quick release legs that deploy in seconds without having to flip over like traditional travel tripod legs.
There’s an omnidirectional ergonomic ball head included that is compatible with all PD plates and most 3rd party Arca-type plates.
When collapsed the tripod measure 39.1 cm (15.4”) in length and 7.9 cm (3.125″) in diameter. The maximum height (center column raised) is 152.4 cm (60″), or 130.2 cm (51.25″) with the center column down. The minimum height (low mode) is 14 cm (5.5”).
The following accessories and tips video provides a lot more details on this unique tripod:
Price Check & Buyer Reviews: Peak Design Travel Travel Tripod
At: Peak Design | Amazon | B&H Photo
Sirui P-326 6 Section Carbon Fiber Monopod
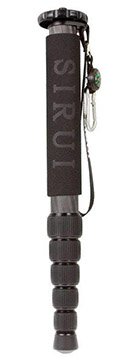
If you are looking for a lightweight yet sturdy monopod for your Sony a6400 then look no further than the Sirui P-326. I’ve had this monopod for a couple of years now and would be lost without it.
It’s constructed of 6 carbon fiber sections, a non-slip rubber foot with fully retractable metal spike and it also includes a wrist strap.
The head features a reversible 1/4″ & 3/8″ screw for tripod heads and cameras. It extends to a maximum height of 1550mm and collapses down to 392mm. It weighs only 0.45kg and supports a maximum weight of 10kg.
Cages
If you are looking for a cage for our a6400 then there are a few options to consider.
SmallRig Sony A6400 Cage (2310)
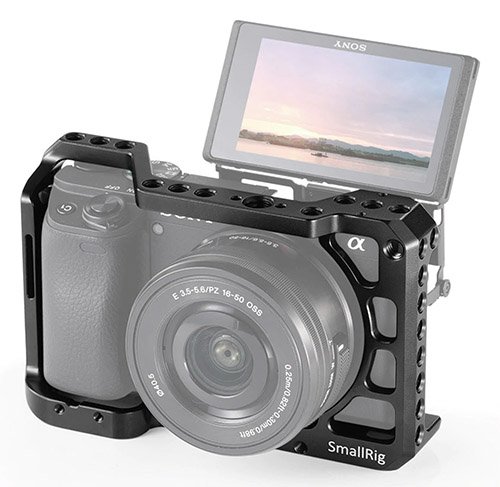
The SmallRig Sony a6400 (2310) cage is the 3rd cage that I own from SmallRig, so hopefully that says something about the quality. The a6400 cage is very well made and as well as all the additional mounting points it also makes the a6400 more comfortable to hold.
There’s a magnetic flat screw driver attached to the bottom of the cage that can be used to quickly attach the a6400, although I imagine this is going to get lost at some point.
Unfortunately unlike their cage for both the a6300 and a6500 there is no cold-shoe mount built in, so you’ll need to add either the 1241, 2260 or the 2044 to your order. My only complaint about this cage is that if you are using a heavy lens like the Sony 100-400 GM or 70-200 GM then you will be gripping the cage a little tighter; in this instance I found the cage could twist a little on the camera body because it’s not a super snug fit.
SmallRig Sony A6300 Cage (1661)
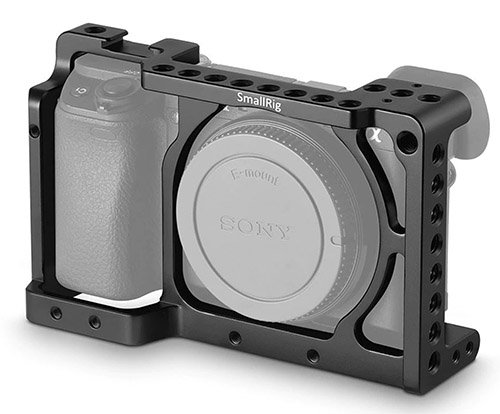
Another cage option for the a6400 is actually the SmallRig cage designed for the Sony a6300. I have one and it also fits the a6400. It also includes a cold shoe which is over by the shutter button so you can mount your microphone there to avoid blocking the LCD screen when it’s flipped up.
Unfortunately I have the same complaint with this cage as I do with the a6400 version, when using a heavy lens and gripping it tightly it does tend to twist on the body a little. With lighter lenses it’s not really an issue.
Gimbals & Stabilizing Rigs
If you would like to have silky smooth video then you will probably want to invest in a gimbal. Here are some of the gimbals that you could use with the Sony a6400.
Zhiyun Crane Plus
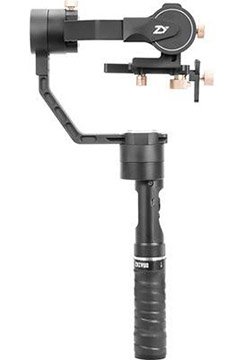
I’ve recently bought the Zhiyun-Tech Crane Plus myself and it works perfectly with the Sony a6400 and balances well together with a lens like the Sony E 18-105 G. The Crane Plus introduces follow focus control, an intuitive way for you to control focus during your shoots.
There’s a newly designed PoV (Point of View) mode that allows for additional camera movement by providing up to 45 degrees of synchronous motion on the roll axis.
What this means is that rather than Crane Plus keeping the camera level when you roll left or right, PoV mode will move with you and roll your camera left or right, up to 45 degrees. Even simpler, when you move, your camera moves with you. The Crane Plus can handle a weight capacity of up to 2.5kg (5.51lbs).
Zhiyun Crane 2
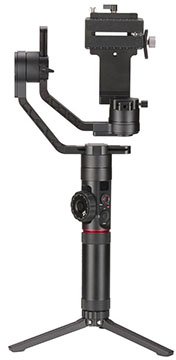
Not to be confused with the Crane v2 (Zhiyun product names are very confusing), the Zhiyun-Tech Crane 2 is a 3-axis handheld gimbal stabilizer offering 360° rotation along all three axes. The Crane 2 introduces follow focus control, an intuitive way for you to control focus during your shoots. Additionally, the maximum payload weight is 3.2kg / 7 lbs.
There’s also an OLED screen that displays camera and stabilizer settings. Other features include a Manfrotto standard quick release plate for rapid camera mounting and a slow-fall function which protects your camera from sudden drops that may occur once the gimbal is powered down.
Zhiyun Weebill Lab
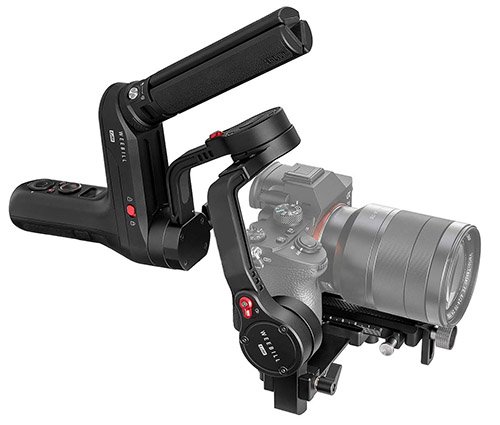
The Zhiyun-Tech WEEBILL LAB has added support for a mini tripod in the upper section of the gimbal, allowing for two-handed operation as well as easily switching to underslung mode. At the same time, Zhiyun has shortened the main handle to make the gimbal more compact and lighter.
The WEEBILL LAB supports up to 3kg / 6.6 lb and offers pan follow, full follow, locking, POV, vortex, and PhoneGo modes with 360° pan, tilt, and roll rotation.
DJI Ronin-S
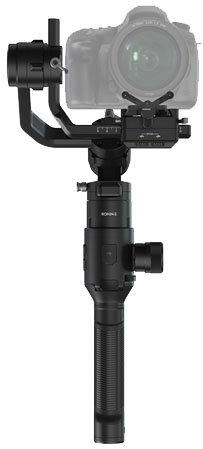
The DJI Ronin-S is 3-axis gimbal that supports up to 3.6 kg / 7.94 lb. Reviews look very positive, but it currently sells for around $100 more than the Zhiyun Crane 2.
DJI Ronin-SC
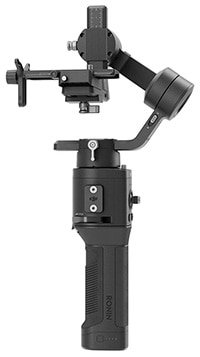
The DJI Ronin-SC is 3-axis gimbal that is tailor made for mirrorless cameras like the Sony a6400. It has a net weight of only 1.1 kg, making it extremely portable and ideal for travelling, yet it still supports a maximum payload of 2kg.
Monitors and HDMI Recorders
There are times when shooting video that a larger monitor makes life so much easier, and sometimes an additional recorder can be useful to eliminate your camera’s internal compression and time recording limits. Of course on the a6400 there is no longer a 30 minute recording limit, but you are still limited by your SD Card capacity.
Atomos Ninja V
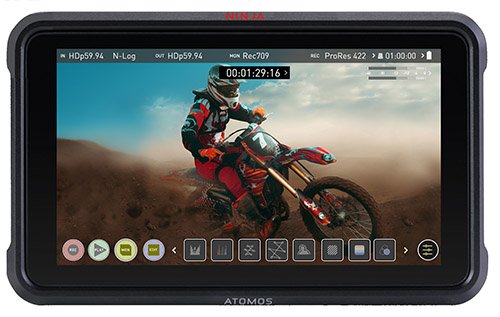
The Ninja V displays 10+ stops of dynamic range in real-time from Log/ PQ/HLG signals. This helps you to see your images clearly in bright daylight on the near edge-to-edge anti-reflection screen. You can also eliminate your camera’s internal compression and time limits and record 4K HDR video direct from the a6400 over HDMI 2.0.
With an 1TB AtomX SSDmini (sold separately) you can achieve up to 150 minutes of 4K recording on a single drive! It supports both ProRes and DNxHR recording formats. I recently picked up a Ninja V myself and have been using it to record the viewfinder output from my Sony cameras, mainly for YouTube videos. My only complaint is that the fan is a little noisy and is picked up by the microphone far too easily.
Camera & Sensor Cleaning
Unless you want to spend ages faffing around in Photoshop to remove lens or sensor dust, it really is worthwhile trying to keep your gear clean. Since the sensor in the a6400 is exposed every time you change a lens, it won’t take long before it picks up some dust particles. However, you are unlikely to see these spots in your shots when shooting wide open, but if you step down to f/11 or higher they will soon become visible. Here are the tools that I recommend to keep your gear clean and shots blemish free.
Rocket Air Blaster

If you don’t already have a Rocket Air Blaster inside you gear bag then this should definitely be one of your first purchases. It’s great for blowing dust off lenses, your sensor and filters. Mine goes everywhere with me.
VSGO APS-C Sensor Cleaning Kit
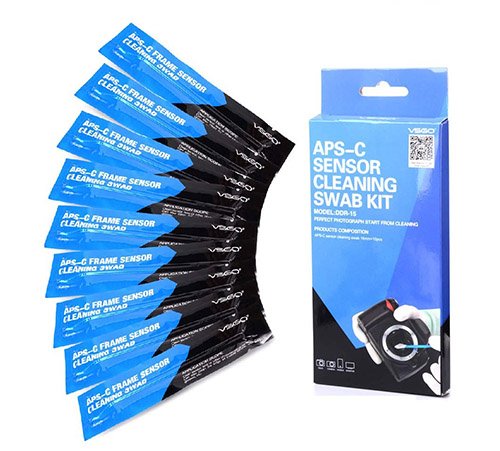
There’s really no need to send your a6400 off to get the sensor cleaned, with this kit you can easily and safely do it yourself for a fraction of the price. Before you start, shoot a piece of white paper with the aperture set at f/22 or higher, this will show you exactly where the dust is located on the sensor.
Price Check & Buyer Reviews for VSGO Cleaning Kit
At: Amazon
Microfiber Cleaning Cloths
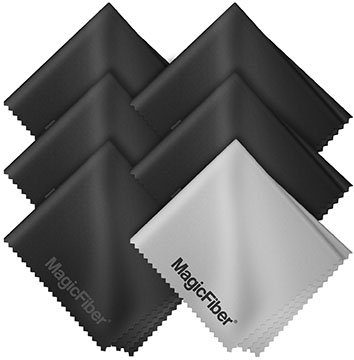
Very soft and lint free microfiber cleaning clothes are definitely as essential item for any photographer, you can never have too many of these.
Check Price & Buyer Reviews: MagicFiber Microfiber Cleaning Cloths
At: Amazon
Care Touch Lens Cleaning Wipes
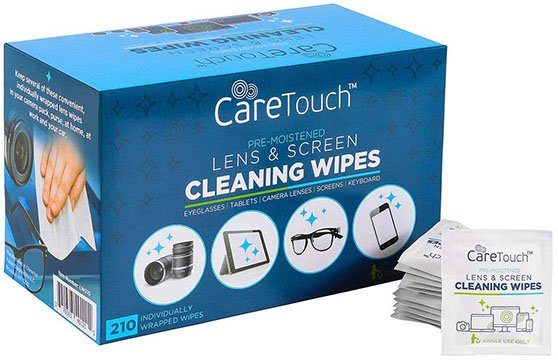
Some good quality lens cleaning wipes are vital if you want to keep your glass blemish free. They are also useful for cleaning your cameras body, LCD screen, as well as any filters you may have.
Price Check & Buyer Reviews for Care Touch Lens Cleaning Wipes
At: Amazon
Replacement Parts
It’s possible to replace some of the parts on the a6400 yourself, here are the replacements parts that are available.
Sony FDA-EP17 Eyepiece Cup
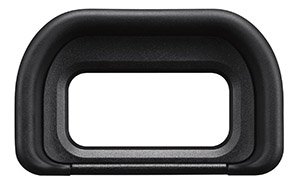
The eyepiece helps to keep out external light to enhance the clarity when using the EVF. If you lose yours, it’s very easy to replace. This is the same eyepiece that’s used on the Sony a6500 but it is full supported with the a6400 and identical. You can check the compatibility here.
Sony ALC-B1EM Replacement Body Lens Cap
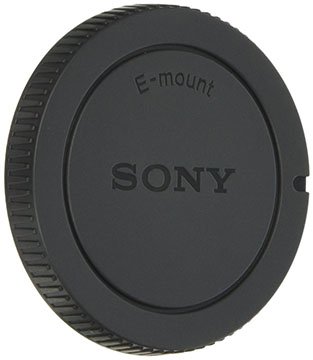
If you have lost your a6400 body lens cap then then you’ll be relieved to know that the replacement is pretty cheap.
Sony FA-SHC1M Multi Interface Shoe Cap
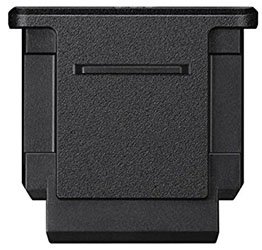
It’s important to keep the multi interface hot shoe cap in place to protect the electrical contacts, as if these get wet there’s a risk of shorting out your camera. I know it’s a very small accessory and far too easy to lose, so make sure you have at least one spare.
Storage and Backups
If you shoot a lot then you are most likely going to require a reasonably sized and secure backup solution for all of you images and videos. Here are a few options to consider:
Samsung T5
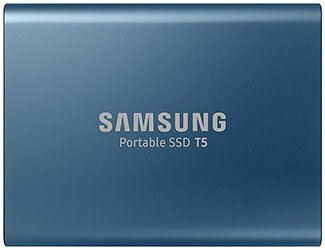
The Samsung T5 is a tiny portable SSD drive that is available in 250GB, 500GB, 1TB and 2TB capacities. I use this as a short-term storage solution to work on images before backing them up to my NAS box. I also take it with me when I go travelling as it’s so small and light.
Synology DiskStation DS220+
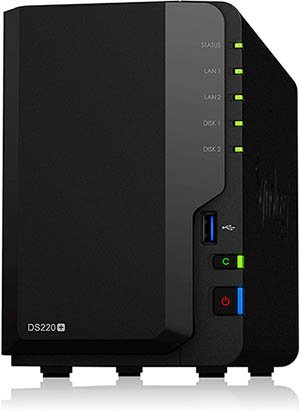
The Synology DS220+ replaces the DS218+ which I’ve been using for a few years now and couldn’t be happier with it.
It’s a Network Attached Storage device that supports two drives in a RAID 1 configuration. These can be either 3.5″ SATA HDD (max 16TB each) or 2.5″ SATA SSD (max 3.84TB each) drives.
You can also configure the DS220+ to sync all of your files with various cloud storage platforms. Full details can be found on Synology’s website.
Cloud Backup

Unless you have a very slow internet connection, backing up all of your photos to the cloud is really a no brainer. I’m using DropBox which syncs nicely with my Synology DS218+. But other options include Microsoft OneDrive, Google Drive, Amazon Drive and Box.


I purchased the Samsung T5 External Drive noted here, and wish to backup my pics/videos from my a6400 to the T5. Can I do so directly without additional HW (i.e. Laptop)?
I’m afraid you can’t backup directly to the T5 from the a6400, you’ll need to transfer the files to your computer first.
Hey, I just bought the Manfrotto MT055XPRO3 055 Aluminum 3-Section Tripod for my A6400, however i have noticed that the screw on the tripod is too large for the A6400? Did you come across the same thing?
Thanks
Hi Harry. Did you also purchase a head to go with it? As the screw on the top of the MT055XPRO3 055 is really intended to be attached to a head like the Manfrotto XPRO Ball Head with 200PL Quick Release Plate. Then you connect the plate that comes with the head, or another plate to the a6400. My apologies if this wasn’t clear, I’ve updated the article to make this clearer.
Yep.. It can be too much to handle..
Maretti15696@aol.com
Hi, I recently bought an a6400 and thus found your site. Interesting suggestions. Thanks.
My biggest difficulty with the camera at this point is there seems to be no way to toggle AF tracking on/off. You can set a button to Tracking On, but it only works in AF-C, apparently. I have found that the camera will switch to tracking automatically, even if I don’t want it to, in AF-C. So you end up with a two-step process, first changing focus modes then Tracking On.
Further, Tracking On requires you to hold the button down, meaning you can only set C1 to Tracking On to leave your thumb free for other back-button functions (like Focus On).
(I do not like using the rear screen to initiate Tracking On.)
(I have seen a Cancel Tracking message flicker on in the EVF, saying to push the dial center button to cancel, but it’s frustratingly finicky.)
Have noticed any simpler way to toggle tracking on/off?
Hi Nikita, you could either register custom shoot settings with AF-C and your Tracking Focus Area then assign these to a custom button on the rear like the centre of the scroll wheel because you will need to keep this held down. Or if you don’t want to hold a button down then assign the settings to MR 1 then you simply need to turn the Mode Dial to MR. Hope that helps a little! All the best, Tim
Thanks for you reply. I will try it.