One of the new features of the Sony a6400 is the interval shooting (time-lapse) option which has now been baked into the camera itself, so there is no need to purchase an additional $10 PlayMemories App or use an intervalometer to capture a sequence of shots.
Sony A6400 Forum & Facebook Group
If you are looking for further help and advice on the A6400 or would simply like to share your photos and videos, then please head over to our friendly APS-C Forum. If you prefer Facebook then I also run the Sony a6400 Shooters Group.
So it seems that Sony finally decided to listen to what their customers have been asking for forever, or perhaps competitors adding interval shooting modes to their latest cameras caused this sudden change of heart. Either-way, it is nice to finally be able to capture time-lapses in camera without relying on additional software or accessories.
Although the new interval shooting option allows you to capture images over a period of time, it does not create the time-lapse movie for you. Creation of time-lapse movies requires the Sony applications Imaging Edge (Remote/Viewer/Edit) Ver. 1.4.00 or later and PlayMemories Home, all of which are free to download and use for both Windows and Mac. You can of course use other software like Adobe Lightroom, Premiere Pro, or Apple Final Cut Pro X to create time-lapses, but for this guide I will be focusing on the free Sony software option.
Now, I just want to be clear, this is most definitely not an advanced guide to creating time-lapses, there are many more talented people out there than myself to teach this. I just want to show you how to setup interval shooting on the a6400, record a simple time-lapse, then bring it together in Sony Imaging Edge and Play Memories to create a movie.
If you are not a big fan of reading then you can also watch my guide on YouTube where I cover everything that you will find on this page. But if you prefer reading or simply don’t like the sound of my voice, just keep scrolling down.
Step 1. Basic Camera Settings
Before we get started with the interval shooting settings, there are some basic camera settings that I recommend nailing down first.
RAW/JPEG & Aspect Ratio
First of all do you want to shoot your time-lapse images in RAW, JPEG or both?
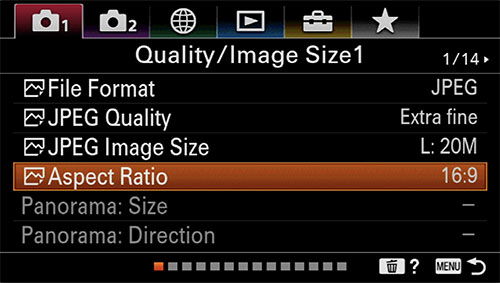
For my time-lapse example in this guide the light was constant and well balanced throughout, so the exposure was fairly straight forward. Therefore I decided to shoot in JPEG only as I felt confident of getting the exposure correct and I didn’t particularly want to edit RAW files afterwards, but this will be your decision. I also set my JPEG quality to Extra fine and the image size as L: 20M.
You will probably also want to change the image Aspect Ratio to 16:9. This is the best ratio for displaying time-lapses on YouTube or your TV. You can find both of these settings in the menu under: “Camera Settings 1” > “Quality/Image Size 1” as shown below:
Just don’t forget to change the Aspect Ratio back to 3:2 when you have finished, as you probably don’t want to shoot your normal photos in 16:9. I made this mistake myself at first!
Turn SteadyShot Off
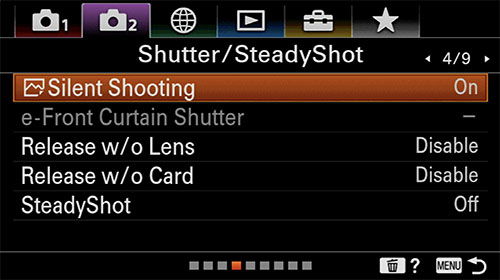
For recording a time-lapse you will definitely want to have your camera on a tripod, so it’s also best to turn off the Optical SteadyShot (OSS), that’s unless it’s a very windy day and there is some camera movement. If you don’t and the camera is steady, sometimes OSS can actually create movement and ruin your shots.
Your lens may not have image stabilization built in, if this is the case you don’t need to worry about it. But if you are using a Sony lens like the 18-135mm that does have OSS, then you need to disable this in the menu under: “Camera Settings 2” > “Shutter/SteadyShot” like shown below:
Step 2. Interval Settings
Now let’s configure the actual interval shooting settings. You can find these in the menu under “Camera Settings 1” > “Shoot Mode/Drive 1” > Interval Shooting Func. Just as shown in the following screenshot:
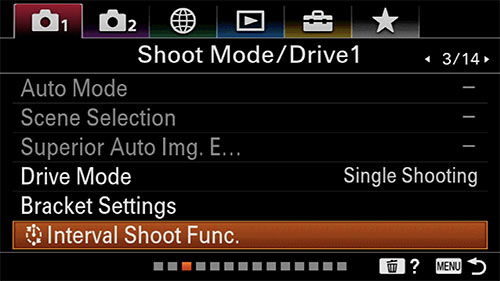
When you select the “Interval Shooting Func” you till be taken to this menu screen:
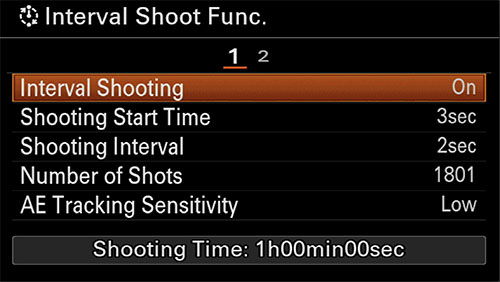
From here you can now configure the following interval settings:
- Interval Shooting: Sets whether to perform interval shooting. (Set this to ON)
- Shooting Start Time: Sets the time from when you press the shutter button to when interval shooting starts. (I set this to 3 seconds)
- Shooting Interval: Sets the shooting interval time from when one exposure starts to when the exposure for the next shot starts. (I set this to 2 seconds). If the subject/scene is fast moving then it’s best to go with 1-3 seconds. If it’s slow moving like very slow clouds then 10 seconds plus is more suitable.
- Number of Shots: Sets the number of shots for interval shooting. (I set this to 1801 which gave me an interval shooting duration of 1 hour). Just remember to check that you have enough space on your SDCard to record all of the shots.
- AE Tracking Sensitivity: Sets the tracking sensitivity of the auto exposure against the change in luminance during interval shooting. If you select [Low], exposure changes during interval shooting will be smoother. (I set this to Low)
If you then scroll across to the second screen you should see the following options:
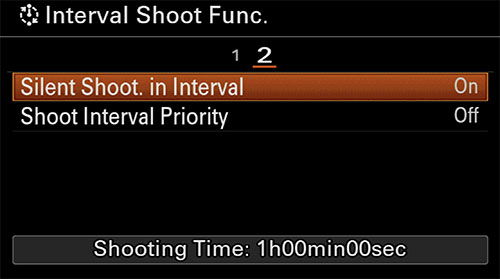
- Silent Shoot. in Interval: Sets whether or not to perform silent shooting during interval shooting. (Set this to on so that it uses the electronic shutter, otherwise you may get some shutter shock from the mechanical shutter and also add additional wear.)
- Shoot Interval Priority: Sets whether or not to prioritize the shooting interval when the exposure mode is [Program Auto] or [Aperture Priority] and the shutter speed becomes longer than the time set for [Shooting Interval]. (I set this to off as it wasn’t going to be an issue for my time-lapse)
Step 3. Camera Mode, Exposure & White Balance Settings
This guide is simply about creating a time-lapse, so hopefully you already know how to correctly expose for the scene that you are shooting and how to set this up in the a6400. If not, please refer to the online help guide.
These are the settings that I decided upon to provide a balanced exposure for my scene:
Focus Mode: Manual
Aperture: f/8
Shutter Speed: 1/250 sec
ISO: 100
White Balance: Shade
It’s best to set as many things to manual as possible, as if you are using AUTO modes both the focus and exposure may change during your shooting interval, then when you compile your photos later you will notice these changes as flicker in your time-lapse. You want to avoid flicker at all costs unless you are shooting RAW and have the patience to edit your images afterwards. If you are recording a time-lapse where the light is changing dramatically like a night to day time-lapse, then you will need to reply on some auto settings, like using Aperture Priority Mode instead of full manual.
Step 4. Turn LCD Display Off (Optional)
When the interval shooting is running the LCD screen will not turn off like it usually does if no buttons are clicked for 1 minute or however long you have set the “Power Save Start Time” to.
Battery usage will vary with your settings, but I found that a 1 hour time-lapse with an interval of 2 seconds between shots would use around 40% of the battery when the rear LCD screen was left on. But it will probably be higher than this if you are shooting in a cold environment.
You can reduce battery usage by around 25% if you turn the LCD off whilst interval shooting and only use the EVF to check that your composition is still good and everything is running smoothly.
To turn the LCD off you need to navigate to: “Camera Settings 2” > “Display/Monitor” > Then change this setting from “Auto” to “Viewfinder (Manual)”. Just as shown in the following screen shot.
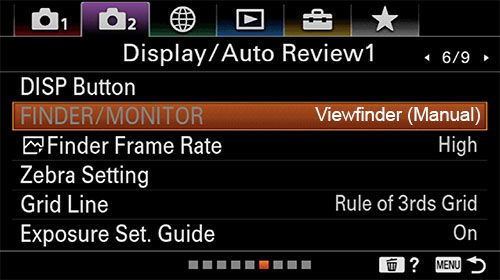
As soon as you change it to “Viewfinder (Manual)” the rear LCD will turn off and you will only be able to view the menu and settings through the EVF. Therefore I recommend doing this as the last step, as I find it a little annoying to setup the camera using the EVF only. As soon as your interval-shooting has finished, you can set it back to “Auto” again.
Step 5. Recording
When you are happy with your composition and camera settings, simply press down the shutter button to start recording. The a6400 will start taking photos once the shooting start time set in step 2 is reached, and finish when the number of shots also set in step 2 is reached. You can end shooting early if you wish by pressing the shutter button again.
Step 5. Playback In-Camera
Once your time-lapse has finished you can now play it back in-camera to check that everything is ok. Probably best to start with a short time-lapse just in case something goes wrong. As you will kick yourself if you spend an hour waiting for the time-lapse to finish only to realize your ISO was set to Auto and not 100. Learn from my mistakes please 🙂
To view and playback the time-lapse in camera simply press the Playback button on the camera (the one on the back next to the dustbin/delete button). You should now see all of your images grouped together like in the following screenshot:
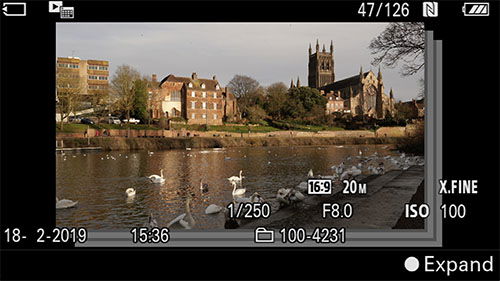
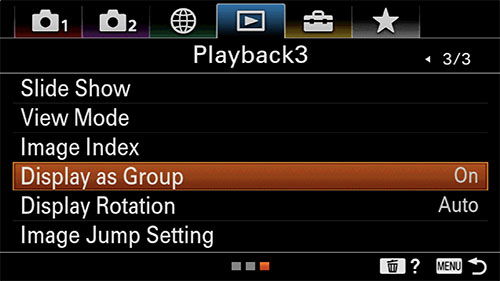
If you don’t see your images grouped like this, then you don’t have “Display as Group” setup under the “Playback3” options in the Menu. This is enabled by default in the Sony a6400, so it should only be disabled if you have disabled it. You need to have this enabled to playback the time-lapse in camera. Here’s the relevant menu screen:
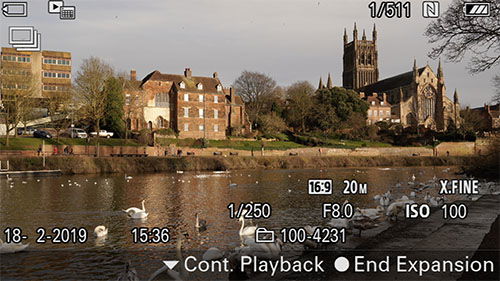
Next click the button in the center of the scroll wheel on the back of the a6400 to expand the group. You should now see a screen similar to the one below:
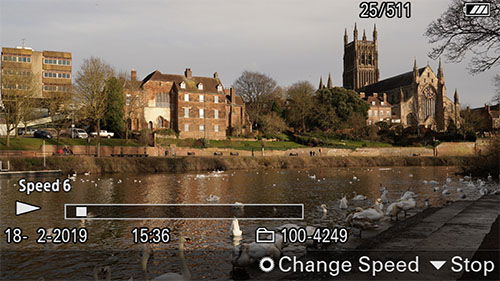
If you now press the bottom of the scroll wheel your time-lapse will start playing. You can also spin the control wheel to change the playback speed.
If you are happy with your time-lapse you can give yourself a pat on the back and head home for a cup of tea and a biscuit whilst you work on editing the time-lapse and creating the movie.
Step 6. Editing
The a6400 will not create the time-lapse movie for you, it will only let you playback the images in camera.
To create a movie to use on other devices or upload to YouTube you will require the Sony applications Imaging Edge (Remote/Viewer/Edit) Ver. 1.4.00 or later and PlayMemories Home, both are free to download and use for both Windows and Mac.
You can of course use other software like Adobe Lightroom, Premiere Pro, or Apple Final Cut Pro X to create time-lapses, but for this guide I will be focusing on the free Sony software option as I mentioned at the start.
Download & Install Sony Imaging Edge and Play Memories
There are both Windows and Mac versions of Sony Imaging Edge and Play Memories available. Here are the download links:
Sony Imaging Edge Download
Play Memories Download
Please install both of these applications on your computer before proceeding to the next step.
Copy Your Images
Once you have installed Sony Imaging Edge and Play Memories you can now copy the images on your SD Card from your time-lapse over to your computer or portable storage device. I won’t cover the steps to do this, it will either be via the micro USB cable or an SD Card reader. Hopefully you know how to do this 🙂
Open Imaging Edge Viewer
Hopefully you have installed Sony Imaging Edge successfully, so you can now open the Imaging Edge Viewer application. You should be presented with a screen similar to this:
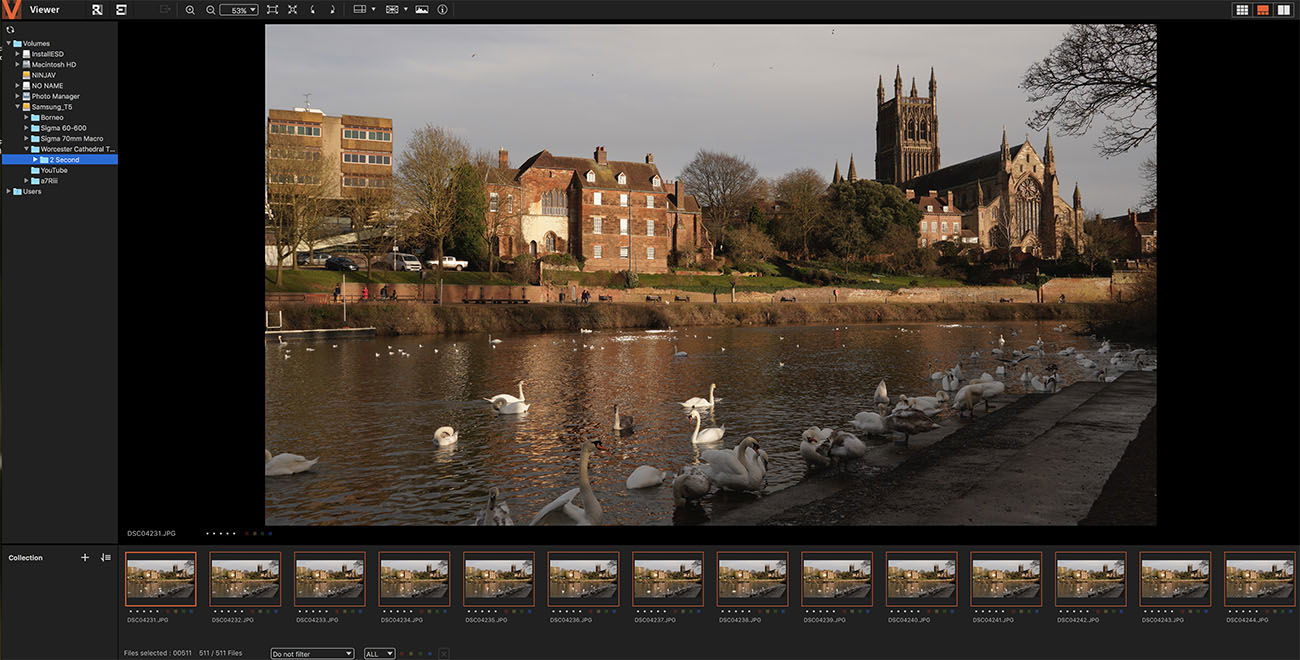
In the window pane on the left select the folder where you have copied your time-lapse images to, once you have done this your images should appear in the bottom window pane just as you can see above.
You now need to select all of your images. Simply click on the first image then use the keyboard shortcut Cmd + A on Mac or Ctrl + A on Windows to select all of the images in your time-lapse. There should be an orange border around them when selected.
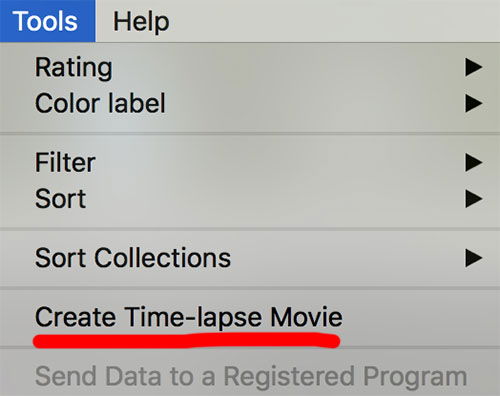
From the Tools Menu at the top you can now select the option “Create Time-lapse Movie” as shown below:
The below options window should now be displayed. If you haven’t installed Play Memories, then at this point you will get a message that Play Memories needs to be installed first.
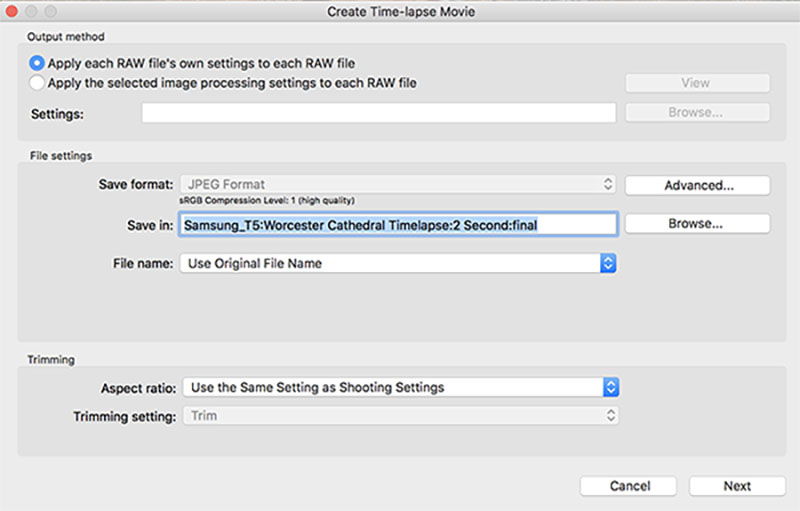
Whether your images are in JPEG or RAW format, leave the option “Apply each RAW file’s own settings to each RAW file” checked, this is the default option. I’m not going to go into applying processing settings in this guide.
Click the “Advanced button” and change the save format to High Quality Level 1 Compression. Then click the “Browse” button to select the folder where you would like to save the time-lapse.
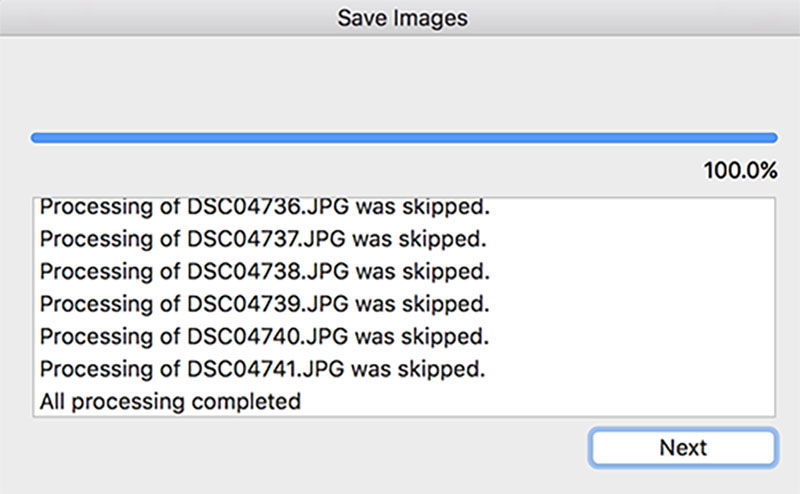
Leave the other settings as they are and click “Next”. Play Memories now tries to apply processing to each of the images, but since we are not processing the images it just displays the following box and skips through them all. Just Click Next when it has finished.
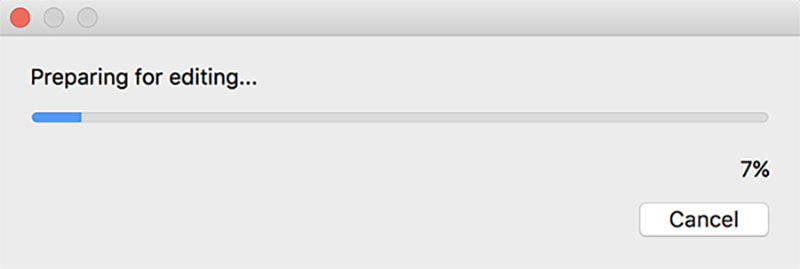
The images will now be prepared for editing, this may take some time if you have a lot of images and will also vary based on the speed of your PC.
Edit in Play Memories
Once the images have been prepared you should see the following Play Memories Editing screen where you can trim your time-lapse, add captions, change the playback speed and add music tracks.
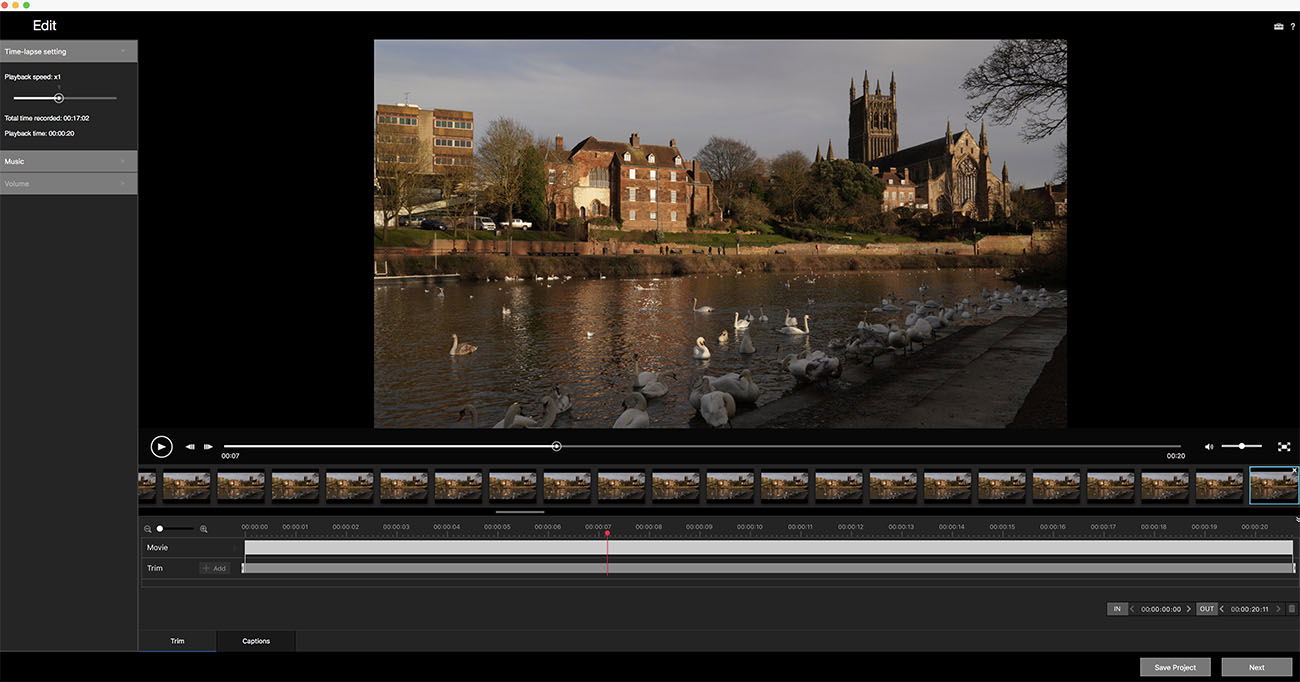
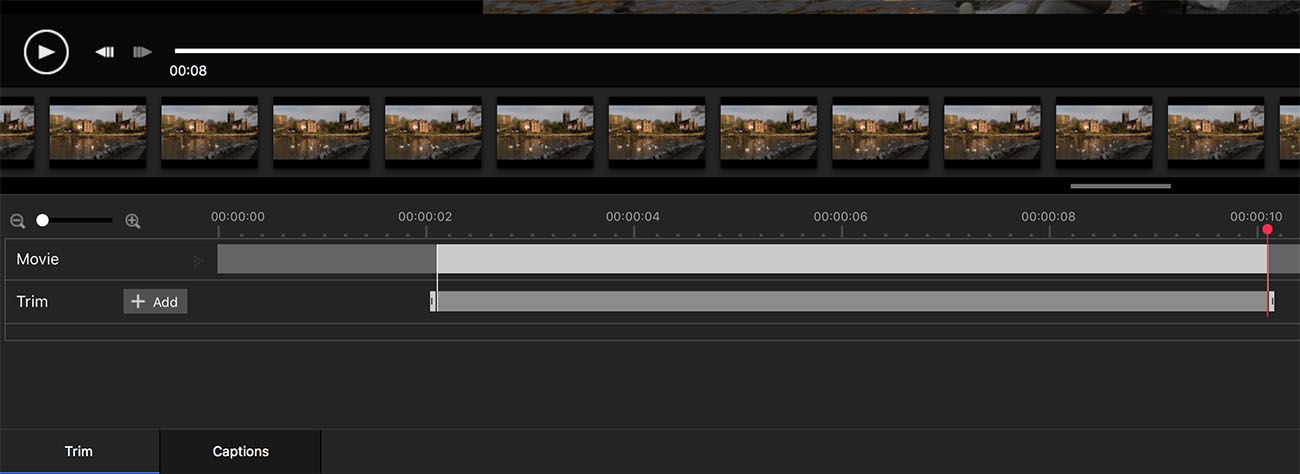
You can trim your time-lapse by moving the start and end bars:
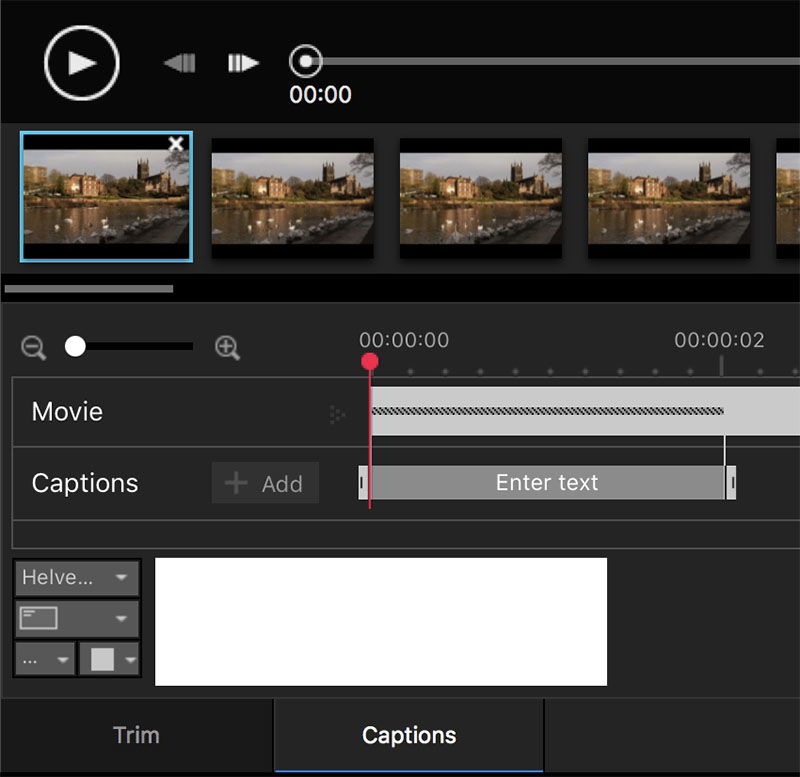
You can also add captions if you wish:
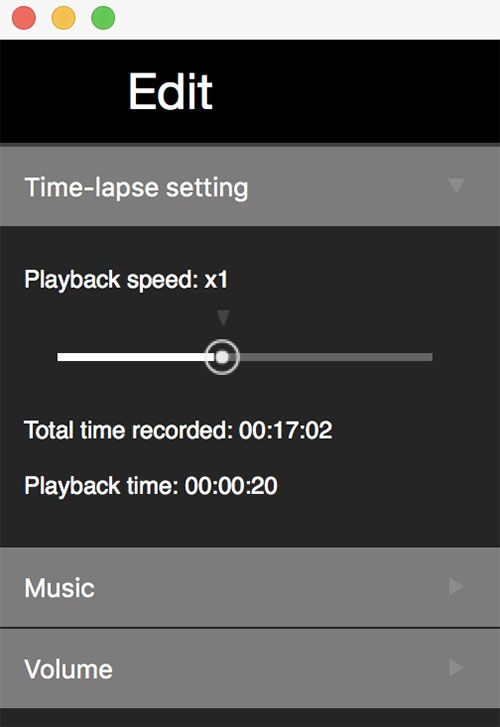
You can also change the playback speed:
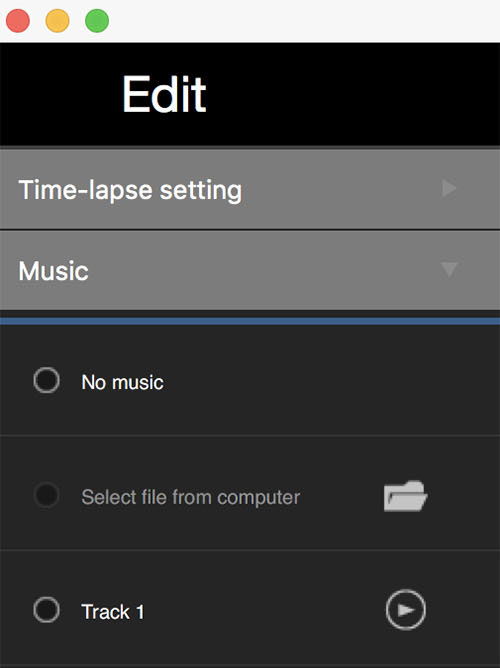
If you want to add music then select a track from your computer or select one of the tracks that are included. I selected track 4 for my time-lapse example:
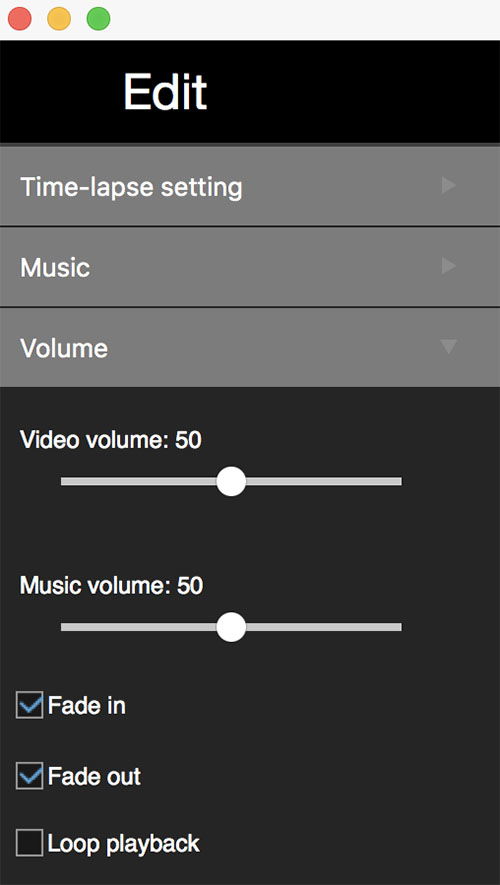
If you add music then you can adjust the volume and whether or not you want it to fade in here:
Save Your Movie
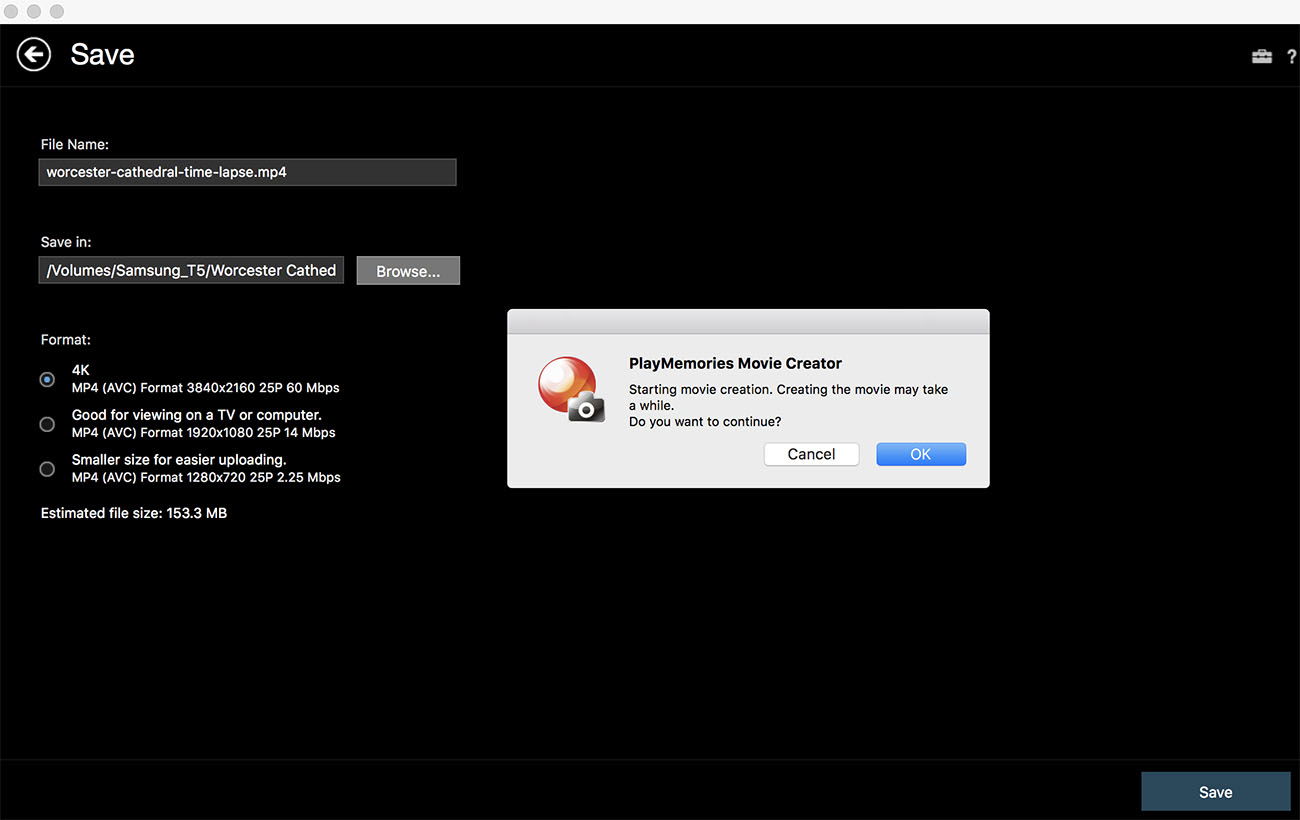
When you are happy with your time-lapse movie simply click the “Next” button in the bottom right of the Play Memories window and you should be presented with the following screen where you can decide the file name, location to save, and format. For my example I chose the 4k format. Then click the “Save” button.
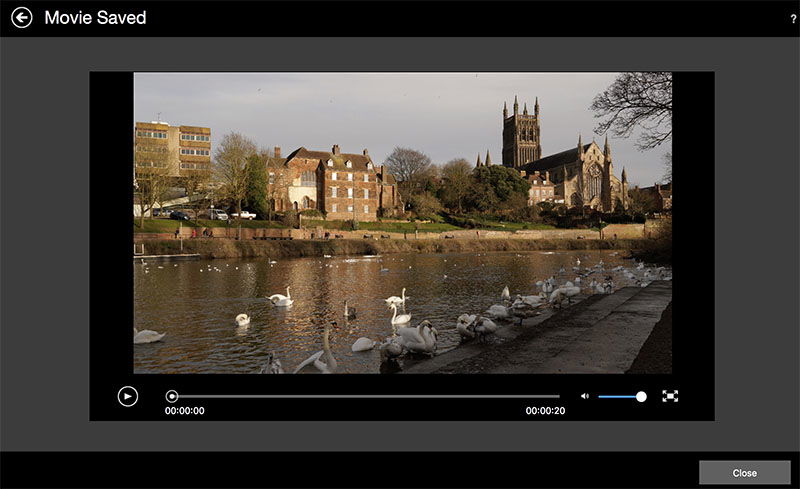
Once your movie has been created the finished version will be displayed and you can hit the play button to check that everything is ok.
Step 7. Finished Time-Lapse
Providing everything has gone smoothly you should now hopefully have created your first time-lapse. Here’s mine:
If something has gone wrong, or if you have any questions on any of the steps above, please do drop a comment below and I’ll do my best to help.






Very nice summary! Just a questions: do you know the bit per píxel (12 or 14) when using the in-built intervalometer? (No using silent mode). Thank you
I’ve tried the ‘shoot interval priority’ on and off for night time lapse. Both were starting at 15s (desired), but the rest were taken with 2s shutter. This was in Aperture priority mode.
I think it worked properly when I first got the camera, but now it’s doing this. Wondering if I changed another setting by mistake?
Hi Brian. Have you managed to figure this out now? In aperture priority mode you can fix the aperture but the shutter speed will be set automatically by the camera and this may change depending on the conditions. I’d recommend trying full manual so you can set the exact shutter speed.
I’ve reached the Create Time-lapse Movie screen. There is no “next” after trimming. It goes on with output, speed, rotation, etc. And goes beyond the screen. I can’t reach a next.
I figured out a better solution to turn off the LCD display.
In menu Camera Settings 2 > Display/Auto Review1 > DISP Button > Monitor, make sure you check the “Monitor Off”. Once you start interval shooting, you can press “DISP” button to cycle to the black screen. Now we can save the battery from monitor and EVF. After you are done, simply press DISP to get the monitor back.
Thank you very much for the tip Yin! 🙂
I have been using the intervalometer option some weeks ago testing it and trying its limit. I connect the a6400 to a bankpower to get some extra juice to the camera but I have noticed that randomly the intervalometer stops shooting, I have tried to figure out but no luck, I usually set it up to 4000 or 5000 pictures but it stops between 2000 to 3000, it is not about battery or space on the memory card, any idea why it suddenly stops shooting pictures? Thanks.
Thanks for this article, plenty useful information here!
I have a problem with my day to night timelapse however, maybe someone knows why. I used aperture priority and auto ISO with max ISO set to 6400. everything works at the beginning, shutter speed gets longer until it reachrs 30s, then the ISO jumps to 125 and that‘s when things start to get weird. It just stops there and the pictures start to get darker until they are just black.
After some investigation I found out that when I set min SS to 15 s, the ISO stops at 250, when I set min SS to 8 s it will stop at ISO 500, and so on… Aperture gets ignored.
Can anyone confirm this behavior or has a solution to this issue?
Thanks, Daniel
My photos appear in random order…. in the folder they r in order but when on the viewer app they are randomized…. how can I solve this?
That’s odd Nick. If you right click in the files pane at the bottom of the Viewer App you should be able to sort by file name. Hope that works! Cheers, Tim
Thanks. All the basics you need to know to get the camera general settings right. Very good guide to beginners as well for advanced shooters. Keep up the good work.
Thanks Teilor. Glad that you found the guide helpful 🙂
Hello. Ia it possible to create the timelapse on an ipad ? Dont own a computer !
Not using Sony software I’m afraid. There is an app called Lapse It available on the App Store but I’ve never used it myself so can’t comment how well this works.
thanks for the information
No worries. Hope you enjoy creating time lapses with the a6400! 🙂